In a previous post entitled A Benchtable  (October, 2007), I showed photographs of a convertible bench/table that I had built in my workshop. Since then, Karl, Kostas, and Sylvia have requested plans for this indispensable piece of outdoor furniture. I have tweaked the design a little bit since the first prototype, and have built a few for testing in the field (literally, in a field).
Â
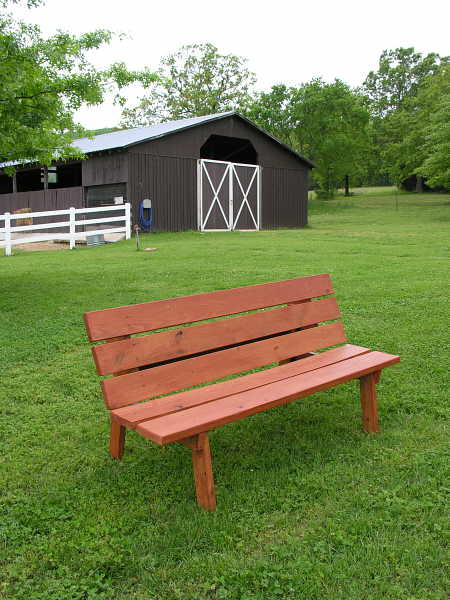
The photograph above shows a recently completed benchtable. From the front, the new design looks the same as the past iteration.
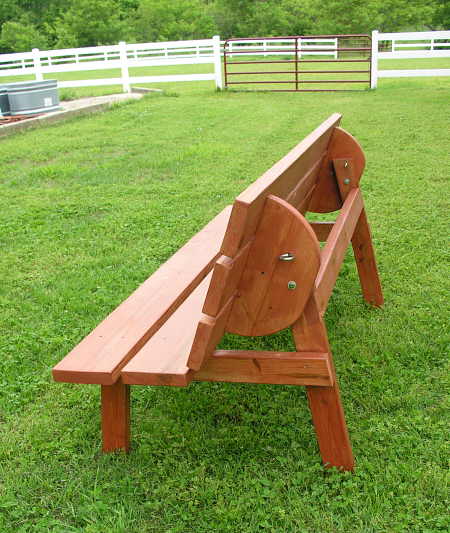
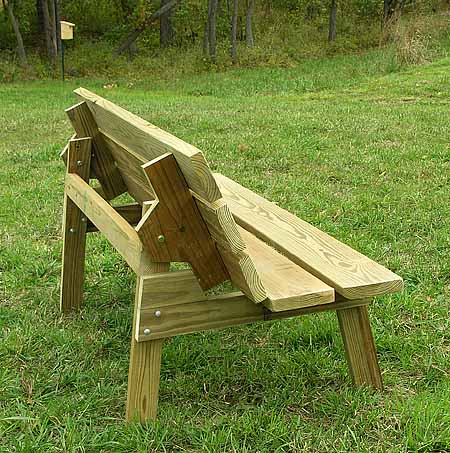
The change is visible when viewing the benchtable from the side or back. Compare the rounded seat back/table top supports in this new design to the old design in the following photograph:
In this old design, the supports were built with straight lines and sharp angles. The old design also employed the use of stop blocks on each side to lock the back support in it’s seating position. The new design provides a more pleasing look, and is locked in place by 5/16″ eye bolts (that also serve to lock the top into position when used as a picnic table).
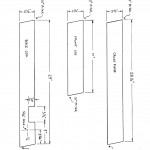
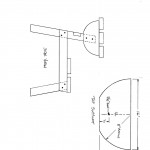
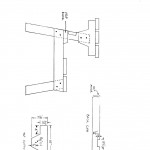
Click on each of the three thumbnails above for a full-sized mechanical drawing, which can then be printed for your use during construction.
Materials List
- Lumber            -  2″ x 4″ x 8’       (3 pieces)
- Lumber            -   2″ x 6″ x 8’       (3 pieces)
- Lumber            -  2″ x 8″ x 8’       (2 pieces)
- Carriage bolts  – 5/16″ x 3 1/2″   (8 pieces + nuts and washers)
- Hex bolt          -  5/16″ x 4″        (2 pieces + nuts and washers)
- Eye bolts         -   3/8″ x 6″         (2 pieces)
- Deck screws    - #8 x 2 1/2″       (32 pieces)
- Carpenters glue
- Sealer (or finish of choice)
Cutting List
- 1 each   -  leg stretcher    2″ x 4″ x 53″
- 2 each   -  seat slats         2″ x 8″ x 72″
- 3 each   -  table top slats  2″ x 6″ x 72″
- 2 each   -  top supports    (per drawing)
- 2 each   -  front legs         (per drawing)
- 2 each   -  back legs          (per drawing)
- 2 each   -   cross pieces     (per drawing)
Assembly Instructions
A)Â Â Cut all parts per cutting list.
B)   Place one rear leg in front of you.  Line up a front leg on top of the rear leg, aligning the bottoms of the legs.  Use the shorter front leg to scribe a mark onto the rear leg, along the top of the shorter leg. This mark will be used to locate the crosspiece in the next step.
C) Position a cross piece on top of the front and rear legs (as shown in drawing #2). When you are certain you have positioned the parts correctly, fasten the cross piece to the legs, using glue and carriage bolts.
D)Â Repeat step C for the opposite side, being careful to realize that the sides will NOT be identical, but are a mirror image of each other.
E)Â Attach the leg stretcher to the leg assemblies, using glue and deck screws.
F) Center the seat slats on the cross pieces. The front seat slat should be flush with the cross piece (as shown in the drawing), with a 1″ gap separating the two seat slats. Attach with glue and deck screws.
G) Attach top supports to the rear legs, using hex bolts. Use a carpenters level to level each support, and tighten the hex bolts.
H) Center the table top slats on the top supports, leaving a 3/4″ gap between the slats. Fasten with glue and deck screws.
I) Double check to be certain that the table top is still level. Using a 3/8″ drill, drill a hole through each top support, continuing to drill the hole though the rear leg, as well. These are the holes that the eye bolts will pass through to support the top in the picnic table position.
J) Now, move the table top to the bench position. Experiment until you find the back angle that feels comfortable for you, and use clamps to lock the seat back into this position. Using the upper 3/8″ hole in the rear legs that you drilled in the previous step as a guide, drill a 3/8″ hole into each back support. Place the 3/8″ eye bolts into these holes to lock the back into the bench position.
K)Â Apply a finish of your choosing, and enjoy your new benchtable!Â



Thanks for the plans! I’m going to have to give this a go.
Great blog BTW.
Cheers,
Ed T.
Thanks for the plans. I hope to build one of these too. I really like the Adirondack loveseat that I built inspired by yours. It has been in our greatroom up until this past Tuesday when I finally got it stained and sitting out on our back deck. It makes sitting out there so much more enjoyable.
I would like to make this into an 8 ft table. Could you please supply the materials needed for such.
Thank you,
barb
Barb – For an 8 ft table, do not cut the 2×6’s or 2×8’s down to 72″, but just leave them at the 8 ft length as called for in the material list. I have built an 8 ft table from these plans that works just fine, but it is a litlle too heavy for me to move around easily by myself.
I can’t make out the drawing, even when I zoom in. Could you please email me a copy?
Thanks
Jeremy
Never mind
Hal:
Your descriptions, instructions, and diagrams are brilliant. I can’t wait to build this!
Thank you so much for publishing this for free. I have been searching all over the internet for some free plans and I came across your site. My husband has developed a love for wood-working/building over the past 5 years and he is good. We recently built a deck extension and your plan for this flip top table will be a perfect additon. Again, I say Thank you from the bottom of my heart. You have made my day. 🙂
Hal,
Your design found its way to Fagaras Romania. Your drawings were brough by the leader of our chruch mission to Little Bit of Heaven. A bible camp that Christ the Rock church in Menasha Wisconsin help start and has contiued to support. Last may 5 of church members traveled there to work on construction projects. Building tables of your design was part of the mission.
Send me an email address and I will send you some photos.
I bought material today to build a table for my grandchildren.
Joe Bach
Do you have plans for a kids size table ?
Thanks,
Jay
Hi all, We sell some of the best quality Lithuanian made solid oak benches on the internet in the UK for indoor use in dining rooms and living rooms. The designs that you offer may be something that i would be interested in offering in the near future when we start to offer outdoor furniture.
Thank you for publishing these plans. I just built my own and it works great. The table top is the perfect height, and it sits pretty well, too.
Thanks again!
Rob
Hi, My sone has just finnished making a bench-table for his “Design and Technology” subject at school. He got a great mark. Thanks for your design. He did add some of his own design mods which I will pass on. The joints were blind-butt-rebates. This made for a realy nice slim line look to the whole leg frame. For the locating bolt he used an 8mm Dia eye bolt. This made it very easy to extract when moving the top/back into position.
Thanks again and have a great Christmas.
DJ
Thank you for your generosity. I plan on making this for my new deck. It will serve two purposes.A place to set groceries and other items when entering the house and as an extra table for guest!
Look forward to wife’s expression when it turns into a table.
Your plans are fantastic. easy to follow plan on making a few so i can give to my family
Thanks for the great, and simple plans. I am on my third bench, since my daughters seen ours. I was curious what tool you used for cutting the notch in the back legs for the spreader 2×4. I have tryed several different means, and still have not accomplished a nice clean (perfect cut/notch) that I wanted. Other than that, they have come out great.
A recently retired novice.
Ken
Ken,
To form the notch, I began by making the two side cuts with a band saw. Next, a curved cut with the band saw will allow the blade to reach the base of a side cut at a 90 degree angle. This will provide the clearance to use the band saw to finish the base cut of the notch.
Hal,
Thanks for the reply. I talked the wife into a compound miter saw, then a drill press, and an upgrade to my jig saw, since I started doing these. I did the first one with a circular saw and a hand drill. I may have to wait until Christmas for my next new tools. Who knew that retirement would cost so much. I do see the need for a band saw or scroll saw in my future. Thanks again for the help, things are just to sloppy, (at least for me) using the jig saw. But no one has complained about the benchs so far, except for me. The wife tells me I’m to picky.
Ken
I grew up with one of these and loved it so much more than a picnic table. You can’t sit back and relax on a regular picnic table and eating on a bench is difficult. What a great way to use a small space to the fullest! I’m so glad you posted this for all to use! Thank you for your thoughtfulness and generosity!
Please email me the project we cannot see the dimensions on the website.
Thanks
Bill,
Click on the drawings above, and they will open full size in your browser window. You can then read the dimensions directly from the screen, or print the drawing on your printer.
I am planning on using your bench design for an my Eagle scout project in Boy Scouts and I was wondering if there is anyway to keep the same design, but not be able to be made into a table.
I came across your blog looking for plans for a garden bench. This bench-table is just what we need! I am going to build one out of cedar I think. Hopefully it can be carried indoors for the occasional hurricane that we get here in Nova Scotia.
Thank you so much for your plans! Made 2 benches in a couple of days with no problems. I substituted 4 2×4’s for the seats, and 5 2×4’s for the table tops, as they were on clearance at my local lumber store. Also cut the table supports in a half-octagon shape as I had no tool to cut a nice semi-circle. Thanks again!
My Daddy built these benches in 1966 and I have torn my Daddy’s workshop up looking for his plans. Thank you so much for making them available. I’ll be building a set for my backyard before summer. Thanks for Indiana – I’m so glad I came upon this site today.
Thanks for the plans. Going to give it a try.
Can you e-mail the project to me. I can’t read the dimensions clearly enough to be certain. Any updates since this was published?
Thanks.
We (my students and I) are hoping to build a couple of your benches for our school garden. Thank you so much for the plans!
We started building our benchtable today! Hope to finish it on Monday! We’re excited to have this on our front porch! Thanks for the plans!
Pingback: Andrew Hazelden's Blog » Building a Bench Table
Hal,
I love this design. Do you happen to have a modified plan to have a more solid composed top, one without any gaps? I want to make this and use in my breakfast nook. Space efficiency in San Francisco is a must. I would love to make my breakfast nook a dual space zone, reading room while it’s not being used to host dinners.
Big thanks in advance.
Vanessa
Hal,
I am planning on using your design for my Eagle Scout project. I am going to build 12 benchtables for the church that sponsors our troop. They should be just what they need.
Have you had any concerns expressed about pinching or other safety issues with the folding top?
William Wrobel, Life Scout
Many thanks for your inspiration, I was only looking to build a bench but mad a ‘benchtable’ instead! I changed a couple of things, lighter table top and a top pivot rather than a bottom one.
Have a look at it on the web link I sent.
Many thanks again
Peter in Portugal
Peter,
Thank you for sharing the photos. I like the design changes you have made, and may incorporate them in the future.
Peter’s pictures can be found here:
http://www.facebook.com/photo.php?fbid=10150598889211081&set=a.78431931080.100768.572471080&type=1&theater
Thank you so much for posting these plans and photos! I built a modified version and we eat dinner outside on our patio almost every night now. My kids love saying “my mom built this!” I’m including a link to your plans on my blog. Thanks again!
Its a wonder bench. Im in afghanistan working with soldiers. I plan to make a few for around the tents. Great plans and thank you for sharing them!!! Oh the link for the board lengths is not work. Please check I want the sizes and angles.
My son and I are planning to build this for his mom. Question is, did you use treated or untreated wood? Also, what kind of sealer was used?
Thanks,
Dean
I WOULD LIKE TO HAVE FULL SIZE PLANS FOR YOUR COMBINATION BENCH AND TABLE. 114 DUNCAN RD, BROWNSVILLE,TEXAS 78526WILL PAY FOR CHARGES.. THANKS
Thanks so very much for this. I almost ordered a PLASTIC hopkins kit
(just add 2 x 4’s… For my Birthday.
But the reviews were terrible, missing parts, plastic degrades in < 2 seasons.
After 2 hrs surfing in interwebs for plans, Ideas- This one truly stands out for its durability & simplicity
P.S. GO wildlife sanctuary!!!
Awesome design. Just made 2 of these so I could put them back to back and have a full size picnic table. Love it. Thanks Hal!
Pingback: wooden bench plans indoor – Woodworking Plans Free Download
Thank-you for the design. I just built it using 1×6’s and 1×8’s instead of 2×6 & 2 x 8’s, to make it lighter. That worked well, but I will be re-enforcing the bench slats, to be sure that it will support some of the heavier people without problems 😉
Hey, we used to have 2 of these benches at the river, got flooded and they were swept away! Unfortunately, I haven’t been able to find them again until now! Could you email me plans, I’m not able to find them, please!
Lisa, the plans are contained in this post – that’s why I posted it!
Can not get demention when clicking on drawings
Pingback: Woodworking Plans Breakfast Nook | Woodworking Repair To Service
Pingback: Simple Wooden Bench Plans Free | Woodworking Repair To Service
Pingback: Garden Work Bench Plans | akaik.us
Pingback: wooden work bench plans free | DIY Woodworking Projects