A Decal That Could Save Your Life

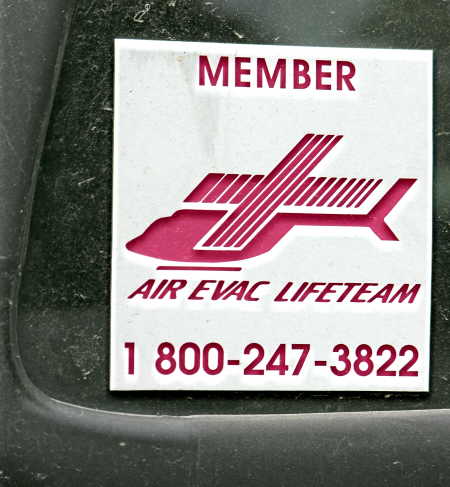
AirEvac Lifeteam window decal 

I generally avoid recommending any specific product or service to others.  I will offer my personal experiences with a product, whether good or bad, and let the listener judge for themselves as to the suitability of a particular product for their specific use.  But in the case of AirEvac Lifeteam, I will not hesitate to urge anyone who happens to live in the state of Missouri, Arkansas, Oklahoma, Kansas, Tennessee, Mississippi, Illinois, Kentucky, Iowa, Alabama, Indiana or Texas to click on the following link to see whether AirEvac Lifeteam operates in your area, or in areas that you frequently visit.

AirEvac Lifeteam

Living in rural America has a great many advantages over life in the big city.  Speed of emergency medical response time is not one of them.  When confronted with the prospect of accidental injury or a medical emergency in remote rural areas, we must do all within our powers to stack the deck in our favor any way we can.  Perhaps you do not live in a rural area, but travel through rural areas often.  If so, then there is always the terrible possibility that emergency medical transportation may become necessary due to an automobile accident.  AirEvac Lifeteam is an organization with a fleet of Medivac helicoptors stationed in strategic rural points to address these needs.  Hopefully, the need will never arise for their services, but if it should be required, then the modest annual dues would seem a trivial expense ($50 self, $55 self + spouse, $60 household of 3+ persons).

From the AirEvac Lifeteam website –

Air Evac Lifeteam was founded in 1985 in West Plains, Missouri by a group of private citizens who wanted to give the people in their community better access to emergency medical care. West Plains had a population of less than 9000, and the closest major hospital was more than 100 miles away by ground transport. The road system in this hilly, remote region of the Ozarks often made it difficult to reach people in a timely manner.

At that time, air ambulances typically were based in metropolitan areas. The company founders believed that the people who need air ambulance transport the most are the ones who live far away from a hospital. They thought that having a helicopter based in West Plains could be of great benefit to patients requiring transport during critical situations. Their goal was to provide a quality service that was affordable to the public.

They knew that for the service to survive in this rural area, they would need other sources of funding, besides traditional fee-for-service billing. They discovered the REGA Foundation in Switzerland, which supported a nationwide air ambulance system by a membership program, similar to the ground ambulance and rural fire department programs here in the United States. After meeting with the head of REGA, Air Evac Lifeteam adopted this idea, and became the first air ambulance service in the United States to offer a membership program.

Air Evac EMS, Inc. was incorporated in June of 1985, and placed its first helicopter into service at Ozarks Medical Center in August of that year. During the following year, more than 5,000 area residents became members, and Air Evac Lifeteam flew hundreds of patients during their times of critical need.

Company founders knew that other rural areas would benefit from air ambulance care, and began expanding the concept. Air Evac Lifeteam’s network of bases now extends throughout the central United States. Air Evac is licensed as an air ambulance provider in Missouri, Arkansas, Oklahoma, Kansas, Tennessee, Mississippi, Illinois, Kentucky, Iowa, Alabama, Indiana and Texas.

In addition, Air Evac Lifeteam operates Regional Offices, with maintenance and fueling centers in Oklahoma City, Nashville, St. Louis and West Plains, Missouri.

Flashback Friday #4

Lessons Learned the Hard Way

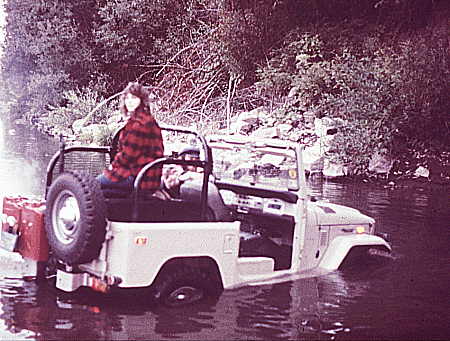
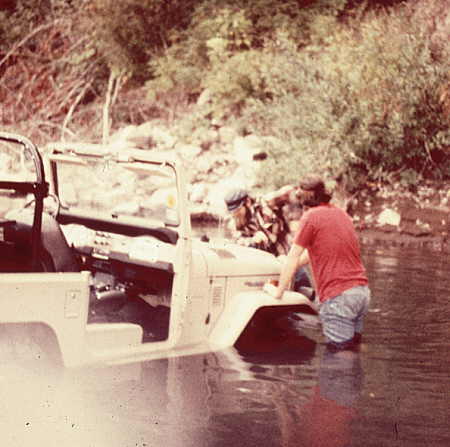
In the early 1970’s I owned a Toyota Landcruiser (“Toy”) that I came to believe was jinxed.  While this vehicle brought me plenty of pleasure in it’s ability to allow me the freedom to explore rugged terrain, it also had it’s share of tempermental moments.   For instance, once on a trip to Oregon to visit my friends Craig and his lovely wife Linda, the three of us decided to explore a slough off the Willamette river.  Along this slough, there were numerous shallow puddles of standing water that we wound around and motored through.  The shimmering water in the afternoon sunlight was an enchanting sight to behold.  So much so that I lost focus on what I was doing and drove directly into a deep hole filled with water.  Darn jinxed Toy!  “Well, this is no big problem” I thought to myself.  We can just back out of this measly little puddle.  I believe Craig just chuckled to himself as he hopped out of the Landcruiser to snap a picture.  Linda was apparently confident at this point in time, at least as far as I can tell from the picture below:

We'll get out of this mess

Putting the transfer case into granny-low gear, I attempted to back the Toy out of the puddle.  We were sitting on a silty surface, however, and the vehicle tires promptly dug themselves into the mud.  Darn jinxed Toy!  “Well, this is no big problem” I thought to myself.  We can just get out the high-lift jack, jack the Toy up very high on the jack, and then push the Toy over to the side, thus putting the tires on a more solid footing.  I believe Craig just chuckled to himself as he hopped into the water to help me along with this scheme.

Hmmm - this doesn't seem to be working

This incident occurred over thirty years ago, and so my recollection of the exact events that transpired from here on may be a little rusty, but I think it went something like this.  Craig and I spend hours and hours trying out various schemes and methods in our attempt to free the Toy.  I recall Craig doing a lot of chuckling in the process.  I recall myself uttering a few curses.  And I recall that we were totally unsuccessful in freeing the Toy.  I had managed to flood the engine with water however, and now we had no power.  Darn jinxed Toy!  “Well, this is no big problem”  I thought to myself.  Actually, “this is now a problem” is what I really thought!

In this part of Oregon, at least back at that time, logging was in full swing.  Fortunately for me and the Toy, Craig pointed out that there was a saw mill located nearby.  It was now near midnight, and we figured (actually, Craig figured) that if we hurried on over to the mill, we might find someone to help us out of our predicament, as the mill shift change occurred at midnight.  Sure enough, we found a man with a four-wheel drive pickup sporting a winch (not an unusual sight in Oregon) who agreed to help us.  Soon, he and his winch had the Toy back up on solid ground.  This kind and helpful man even towed my now non-operating vehicle to a local service station, where we parked it for the night.

The following morning, Craig gave me a ride to the service station, where I learned from the mechanic that yes, he could drain and flush the engine, transmission, transfer case, front and rear differentials, but that it would be very costly.  Darn jinxed Toy!

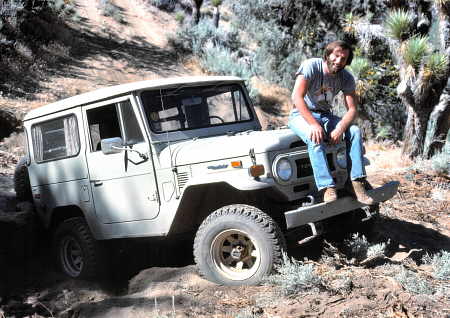
The following year, while out exploring in the California desert with some friends, we had a little competition to see whether my Landcruiser F-40 could outperform their Jeep CJ5 over a rugged desert trail.  Up and down the hills and ravines we drove (in a designated ORV area, I should note) pushing our vehicles to the limit.  My Toy performed admirably in this battle of the 4WD’s, that is, up until the very last hill on the trail.  I was so thrilled over the prospect of a good showing amongst my Jeep driving friends that I lost focus once again, and drove over a large rock that I shouldn’t have.  My vehicle became high-centered on a boulder, and I was once again stuck.  Dang rocks!   Darn jinxed Toy!

When will I ever learn?

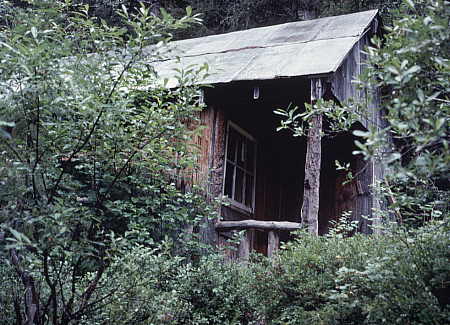
Later that same summer, I again headed up north, this time to the west coast province of British Columbia, where I was keen to do some hiking.  Along the way, in Washington state, I met a nice couple who were very interested in my Landcruiser.   After much discussion about the pros and cons of owning such a vehicle, we decided to do some day hikes together.  When they learned that I was headed towards the Canadian Rockies, they offered me the use of a cabin they owned in BC.  They told me that they had built a bridge over a river that runs alongside the cabin, and that the hiking from that point was excellent.  I took them up on their offer, and so they proceeded to draw a map directing me to their remote cabin in the woods.  When I arrived at the cabin, this is what I found –

 This is the place I'm supposed to stay in?

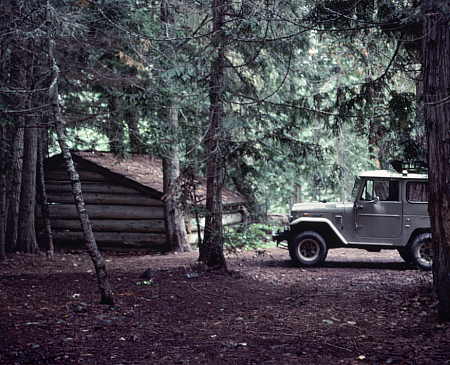
Parking the Toy, I investigated this old dilapidated structure.  From inside, you could see rays of daylight streaming through the roof.  There were all manner of creepy-crawlers on the floor and on the walls.  Droppings from vermin was everywhere.  This was not the type of accommodations I had expected, and I refused to stay in such quarters.  Exploring out back, I found what appeared to be some type of old storage structure, or maybe an old hog shed.  Whatever it was, it was clean inside and had a functional roof, so it became the base camp for my hiking.

A good place for shelter from the rain

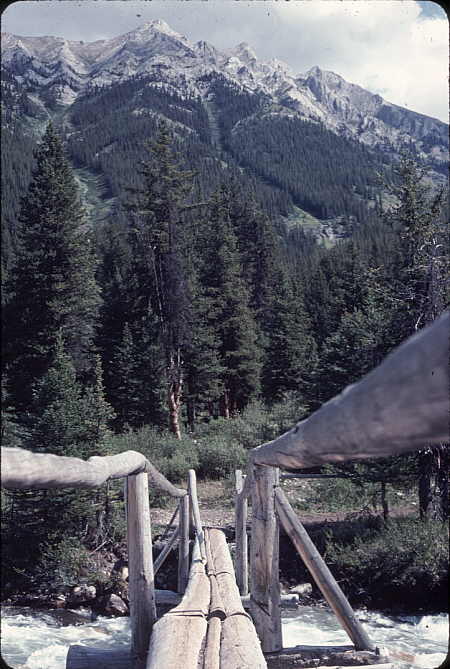
Even though the cabin that the couple had told me about had not lived up to my expectations, the hiking that was available beginning across their bridge was some of the best I have ever encountered. 

A great place to begin hiking

After spending a week hiking and camping out in the hog shed, I decided that it was time to push onward in my journey.  As I loaded up the vehicle with my camping gear, I noticed a large puddle of fluid underneath the front of the Landcruiser.  Getting down on my hands and knees to investigate, I discovered that some critter had chewed through the lower radiator hose, thereby releasing all of the coolant from the radiator.  The vehicle was again non-operational, and I was stuck far from any village or town.  Darn jinxed Toy!  “Well, this is no big problem” I thought to myself.  Having the foresight to pack the always-essential roll of duct tape in the tool box, I proceeded to wrap the damaged hose with tape, fill the radiator with water from the river, and limp on over to the nearest town, where proper repairs were undertaken.

It was not until years later, after I had sold that Landcruiser, that I finally realized what wonderful experiences that Toy had given me.  And looking back, I can now see that I was the cause of most of my travails with that vehicle, not the vehicle itself.  So the lessons learned are A) look to yourself as the cause of your follies, and B) drive a Jeep instead of a Toyota!

Bridging the Generation Gap (Part 1) – 35mm Film/Slide Scanners

Of course, the generation gap that I am referring to is the technological generation gap that exists in the photographic world today.  On one side of the chasm you have new, digital technologies that reduce the visual world to an ordered series of 0’s and 1’s stored within a digital file.  On the other side of the chasm are the traditional photographic technologies that rely on film and emulsion to be the storage media for the image. 

If you are young enough to be a product of the digital era, it is likely that all of your accumulated photographs already reside on your computer, so you will find yourself standing securely on one side of the digital divide.  If you happen to be old enough,  it is likely that all of your accumulated photographs are of the traditional film type, and it may be that you are quite content with the status quo.  If so, then you will find yourself standing equally secure, but on the opposite side of the digital divide.  In between these two extremes, however, are legions of photographers (myself included) who possess both digital images and film images, perhaps numbering into the thousands for each type.  For these photographers, questions often arise as to the best method of moving an image back and forth between film and digital media.

Over the past years, I have struggled with some aspects of the film-to-digital, digital-to-film conversion dance.  Although not an expert in these areas, I have learned a few things from both my successes and failures, so I will share them with you in a seriously serious series entitled “Bridging the Generation Gap”.   Part 1 shall begin where I began my own journey into this brave new world, with 35mm film/slide scanners.

In 1993, there were no consumer digital cameras.  Kodak had just recently announced the DCS 200, based on a Nikon 8008 camera body, but that was a professional 1.5 mega-pixel camera that sold for over $10,000.  Without a lens!  While there might not have been consumer digital cameras, there where plenty of computers around, and plenty of people who wanted to digitize their film-based photographs in order to edit, print, share and archive them. I was one of those people, and so I began my search for a scanner capable of digitizing the thousands of 35mm slides that I had accumulated over the years.

The first scanner I owned was a Nikon Coolscan LS-10e.  This was a 2700 dpi – 8 bit per color channel slide/film scanner that was considered to be of excellent quality in its’ day (1993), and which sold for approximately $2000.  This scanner would produce a 24Mb uncompressed tiff file from a 35mm frame.  I can honestly say that I pushed this scanner system to it’s limit.  I can also say that this system was a nightmare to install and use.  I use the term “scanner system” deliberately, because at the time this scanner was marketed by Nikon, there were three critical components necessary to create a successful scanning environment; the scanner device itself, the computer interface, and the scanner software provided by the scanner manufacturer.

To explain the shortcomings of the Nikon scanner system, I really must take you back in time and refresh your memory as to the state of the graphics world in 1993.  Apple Computer was the name of the game, and a Mac was the machine you needed to have.  Adobe ruled the graphics/imaging software world, and Photoshop Version 2.3 reigned supreme.  In the PC world, the Intel Pentium chip had just been introduced, and this 60 MHz “screamer” could be had for as “little” as $878.  If you were at the cutting edge, you would have been thinking of upgrading your Microsoft MS-DOS Version 6.0 to Windows for Workgroups Version 3.11.  Woe unto the poor, misguided soul who dared venture into the graphics field armed with merely an Intel/Microsoft based PC.

Why was it so difficult for us PC guys to use our computers for digital imaging?  If you examined Photoshop v2.3, for instance, you would find that the software was originally written and optimized for the Mac platform, and then (poorly) ported over to the PC platform.  Ditto with the scanning software provided by Nikon for the LS-10e.  Originally designed for the Mac, it too was a botched port to the PC platform.  Added to this unfortunate mix was the fact that the Nikon LS-10e driver relied upon a specific Adaptec SCSI interface board to communicate with the computer, and that particular Adaptec board had numerous issues with the extended memory managers that were a necessary part of the PC’s configuration back then.  Despite all of the problems, Nikon and other imaging vendors recognized the huge market the PC represented, so it was “off to market” with whatever products they had at hand.

I could write a a very long article about all of the problems I had with the Nikon LS-10e scanner system, but that is not the purpose of this post.  Suffice it to say that for every scanning session, I had to reconfigure autoexec.bat files, config.sys files, reorder the devices attached to the SCSI daisy-chain, reboot the system, say my prayers, and then scan.  If my prayers were answered, the scan would be successfully completed without crashing the computer two or three times.   When finished scanning, the entire process had to be reversed to enable normal use of the computer.  Add to this the problems encountered, and the time consumed when trying to perform digital editing of a 24 Mb image file on a machine that could only “see” 640k of the file at a time, and you had a scenario in which a person had to be pretty motivated (or have had plenty of free time) to do any serious scanning.  Having said that, the results obtained after exerting all this effort in scanning a slide or negative were excellent.  The Nikon scanner was great at rendering an accurate and pleasing image file for those images that I scanned using it.  But because of the enormous time commitment involve in the process, I never even came close to my goal of digitizing all of my old film-based images.

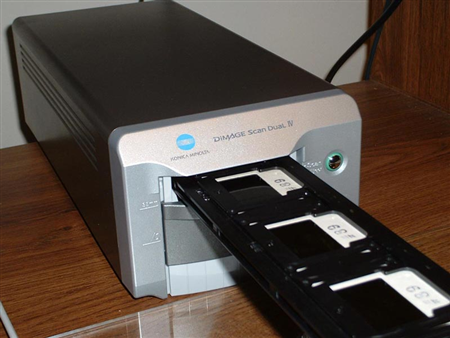
Two years ago, I decided that the time had come to reopen the book on my slide/film scanning escapades, and so I again ventured out into the 35mm slide/film scanner marketplace.  What I discovered was that the slide/film scanning situation had changed very dramatically since my last foray into the arena a decade ago.   After examining the offerings available, I settled on a Konica/Minolta Dimage Scan Dual IV 35mm Slide/Film Scanner (whew… that’s a mouthful). 

Konica/Minolta Dimage Scan Dual IV 35mm Slide/Film Scanner

This scanner is a 3200 dpi – 16 bit per color channel 35mm slide/film scanner that also accommodates APS film.  This scanner will produce a 70Mb uncompressed tiff file from a 35mm frame, or nearly 3 times the information capacity of the Nikon Coolscan produced file.   The scanner connects to the computer via USB 2.0, so it is simple, quick and readily available to most users.  The scanner is supplied with the scanner utility software as well as a copy of Adobe Photoshop Elements.  I paid less than $250 for this scanner in 2004.

My experience with this scanner has been diametrically opposite of my experiences with the Nikon scanner of the 1990’s.  After the initial installation, which involved nothing more than inserting an installation CD into the drive and then plugging the USB cable into the computer, the scanner worked flawlessly.  I have used this scanner to scan hundreds of slides, and it has yet to crash in the midst of the process.  The Nikon Coolscan, on the other hand, would sometimes take two or three rebooting cycles of the computer just to achieve one successful scan.  The slide holder (which can be seen in the photo above) holds four slides at a time.  Now that I have become familiar with the software and have established a usage routine, I can prescan four slides, apply minor image correction and cropping to each image, and complete the final scans on all four images in less than ten minutes.  So at a rate of about 20-25 slides per hour of work, I am slowly making a dent in my digitizing efforts.

Quality of Scan Issues

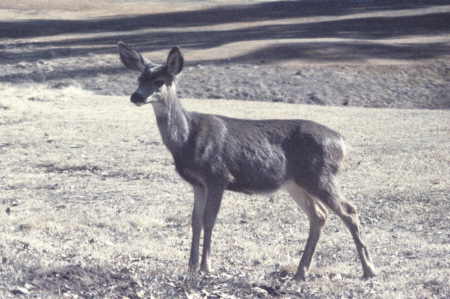
For the type of usage that I have put my scanners through, I can make a few general observations regarding image quality.  The first observation is that the quality of the scanned image is directly related to the type of film that is scanned, regardless of which scanner you use.  The results of both the Nikon and Konica/Minolta scans reflect the fact that grainy films produced poor scans from each.  For example, here is a scan produced by the Konica/Minolta scanner from a GAF color ASA 400 slide film (which is considered a grainy film). 

GAF ASA 400 Film example

This scanned image has lost most of the sharpness that exists on the original slide.  Additionally, if you examine the shadow areas at the top, the grain of the film becomes apparent, much more so than when the film itself is examined under a loupe.

And the following example is also GAF ASA 400 slide film, scanned with the Nikon Coolscan.  This photo was taken in Yosemite National Park at night, using a time exposure (notice the stars in the sky).  You can really see how the grain is exaggerated in the sky with this scan.
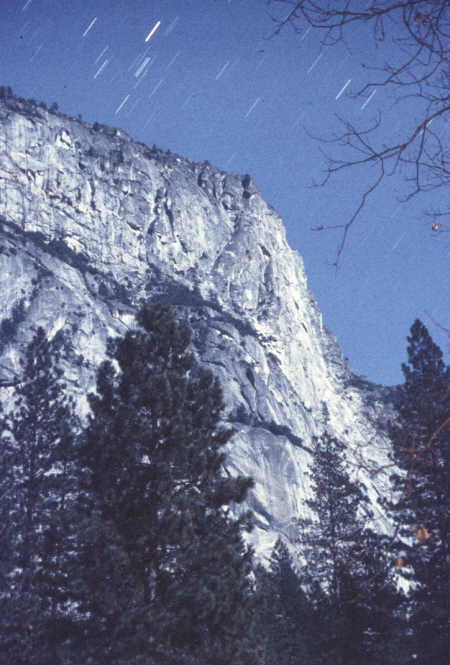
GAF ASA 400 Time Exposure

The second observation is that both scanners produced excellent results when the film in question was a good exposure taken on a fine grained film.  Here are two more examples to illustrate this point.  The first is a photograph taken with Fuji Velvia 50, considered to be a highly saturated and fine grained color slide film, and originally scanned with the Nikon Coolscan:

Spanish Shawl Nudibranch

Notice the deep saturation of the resulting scan, and also notice that there are no grain artifacts in either the background, or in the “skin” of the Spanish Shawl nudibranch.  The following photograph of a Corvette fender (everybody has a photo of a Corvette fender, don’t they?) was taken with Kodacolor ISO 100 film, and it was scanned with the Konica/Minolta scanner:
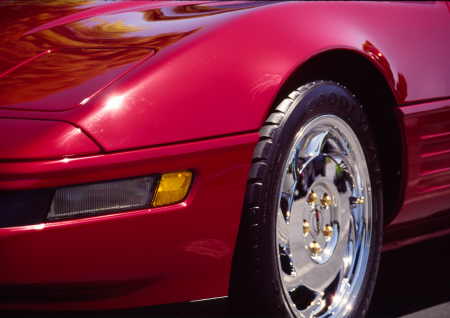
Kodacolor ISO 100 slide film

In examining the photo above, you will see bright saturated color, and no hint at any graininess.  The detail in the images has been retained in the final scan, and artifacts are kept to a minimum.  Overall, I have been very pleased with the quality of the scans that I have made with both of these systems,  but I have been extremely pleased and surprised at the ease of installation and use of the newer generation Konica/Minolta scanner.

As a concluding thought, I would say that the goal of digitizing my collection of slides will probably be accomplished eventually, but not in the near future.  At a rate of 20-25 slides per hour of work, the scanning process is still a slow procedure.  Fortunately, I do not shoot with film anymore, so my collection of film-based photographs will not be growing.  In the meanwhile, it is quite enjoyable to see pictures taken long ago become available for viewing and sharing on a computer platform.