The People Pond

We are fortunate to have several ponds scattered around our property.  Previously, I had written about three of them: the catfish pond (remember the discussion about flocculant?),  the carp pond (recall “The Grassing of the Carp”),  and the spring-fed pond (which shrank dramatically during the dryness of last year).

There is another pond on the property, which is the subject of this post.  I call it the “people pond.”  As caretakers of the land and stewards of the animals, we strive to provide an aquatic environment conducive to the well-being of all the wildlife that reside at this location – so why not the human inhabitants, as well?

Unlike the other ponds on the property that automatically adjust themselves to exist in all seasons throughout the year, the people pond needs a little extra effort and management.  In the fall, the people pond needs to undergo the process of winterizing.  The people pond must be cleaned, and the water chemistry adjusted for the long winter to come.  Pipes, pumps, filters and other equipment must be drained of all water, to prevent expansion damage that would occur if water were allowed to freeze inside of the equipment.  The water level is drawn down, and the people pond is covered for the duration of the cold season.

In the late spring, usually around Memorial Day weekend, we anxiously undertake the annual ritual of opening up the people pond for the summer.

Winterized people pond

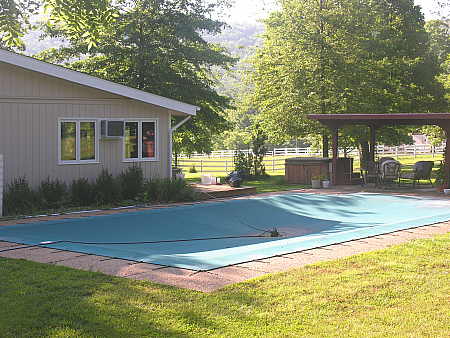
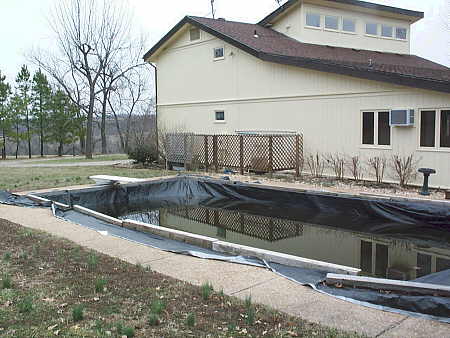
The winter safety cover shown in the photograph above serves two purposes.  First, it serves to protect against accidental people pond incidents, and second, it keeps dirt, leaves and debris out of the people pond during the winter months.  In the center of the cover sits a sump pump, equipped with an automatic sensor switch, which keeps the cover drained of water from rain and melting snow.

People pond winter safety cover fastening system

The cover is attached to the decking that surrounds the people pond by a series of heavy elastic straps, which are held in place by bronze retractable anchors embedded in the deck.

Telescoping strap anchors

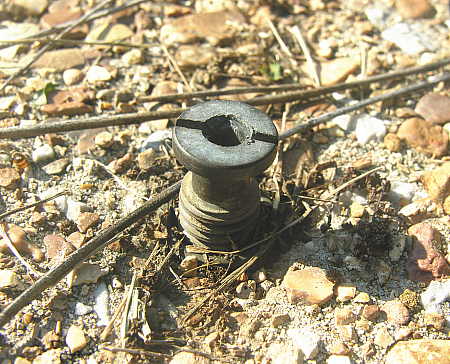
The retractable anchor tend to accumulate debris over the course of the winter, so it is necessary to wash them off with a strong stream of water from the garden hose.

Protectant applied to anchors

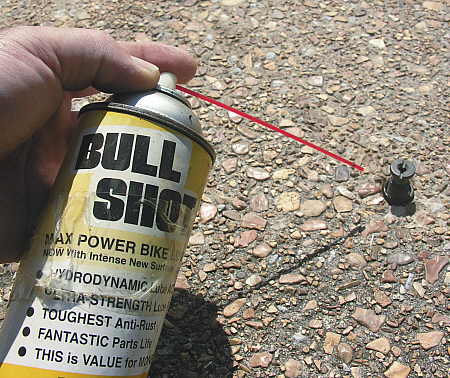
Before screwing the anchors flush into the deck, I find it helpful to spray them with a little lubricant first.  The product that I like to use for this purpose is either Bull Shot, shown above, or Boeshield T-9, developed by Boeing Aircraft Corporation.  Either one of these products contain a wax-like ingredient, which assures that the protectent will adhere to the anchor even in wet conditions.

Gizmo for winterizing the people pond skimmer

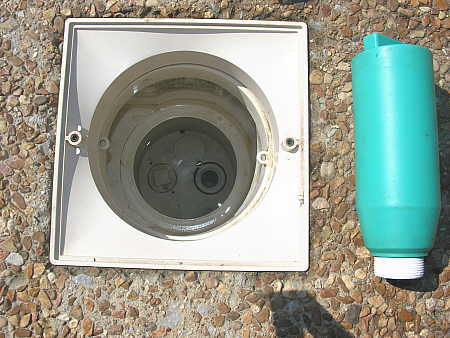
The turquoise gizmo that you see beside the skimmer assembly is just that – a Gizmo ™.  This device is used to seal the water return lines in the winter, after they have been cleared of water.  If you look closely at the photograph above, you can see the hole down at the bottom of the skimmer that the Gizmo screws into.  With the Gizmo properly in place, any rain water that manages to get into the skimmer and freeze will not ruin the equipment.  As the freezing water expands, it will cause the Gizmo to collapse in on itself, thus sparing the skimmer from damage.

Cleaning the people pond cover

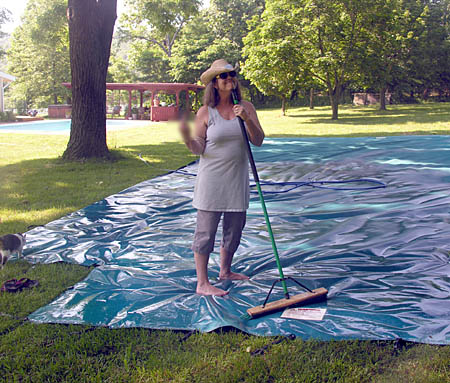
The people pond cover needs to be cleaned and thoroughly dried prior to summer storage.  As you can see from the photograph above, it is not particularly good form to be standing around taking pictures as your better-half does all the work!  Thank goodness for the blur function of my image editing software, or you might see the “salute” I received for my blunder.

Storage bag for people pond safety cover

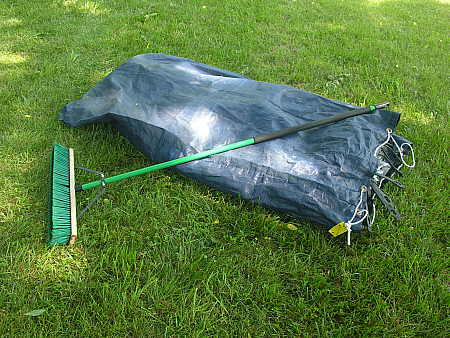
The people pond cover folds nicely into a breathable nylon storage bag, which will find it’s way into the equipment barn for the summer.

People pond now open for the summer

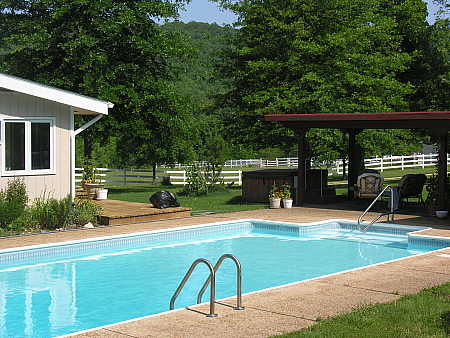
Now that the cover is off the people pond, all that remains is to raise the water level, adjust the water chemistry, prime the pump and filter units, and install the hand rails and exit ladder.  Notice the clarity of the water in this picture.  This is what the water should look like immediately upon removing the people pond cover.  If the water does NOT look like this, then somebody did not properly adjust the water chemistry prior to winterizing the people pond the previous fall.

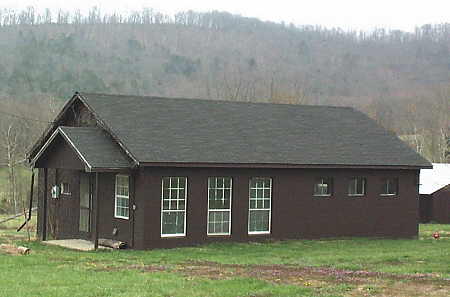
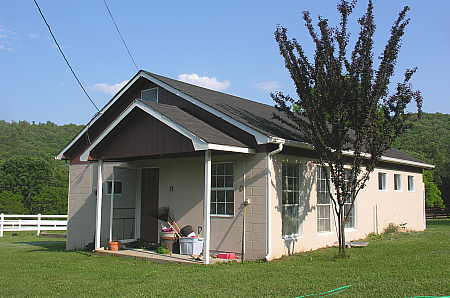
Our people pond has been quite a project.  Compare the photograph above with the picture that is shown below.

People pond in it’s less glamorous days

This is what the people pond looked like when we bought this house.  It was in dire need of some TLC, needing a new liner, winter safety cover, pump and other necessary equipment.  The water was filthy and gross, containing slime, algae and assorted creatures.  It did not deserve to be called a people pond.  Now it does.

A Project Long Delayed

Luna Moth

This morning, after finishing my cup of coffee, I headed outside to begin my chores.  George (our faithful yellow lab) accompanied me as I made my way over to the milking barn, where I spotted this lovely Luna moth that you see in the photograph above.

Luna moth resting on shop door

The Luna moth was resting on the back door of the milking barn, and seemed to be completely oblivious to my presence.  He ended up spending most of the morning clinging to the door, perhaps taking advantage of the shade on that side of the building.

Milking barn before repairs were made

This is what the milking barn looked like when we first bought this property.  It was in pretty poor shape, and was being used to store mostly junk.  Step-by-step, we have been undertaking a renovation of this building. 

We are now converting the front room into a tack room ( a room where we will store saddles, pads, blankets, bridles, halters, leads, crops, carrot sticks, reins, bits, farrier tools, brushes and combs, fly spray, medications, and all the hundreds of other things you find are necessary to keep horses).

One-time dairy barn

Here is the front of the milking barn as it looks today.  We call this the “milking barn” because it was built and used as dairy barn in the past.  This 36′ x 25’ building is constructed from cinder block, and is comprised of two equally sized 18′ x 25′ rooms.  The room toward the front of the building (with the full-length windows) formerly contained a stainless steel milk storage tank, and was thus called the “tank” room.  The milk was picked up every other day by a dairy wholesaler, who transported the product to a major milk processor.

Rear of former dairy barn building

This is the rear portion of the building, which is where the cows would be milked daily.  The room on this side of the barn was obviously called the “milking” room.  Inside the milking room were eight stalls arranged in a herring-bone pattern on either side of the room.  In the center of the room was a four foot deep milking pit, where the person doing the milking would stand to work, much like the pits that are used in an oil-change garage for the mechanic to position himself under the vehicle.  Grain was stored in hoppers located in the attic above the milking room, and a system of chutes would automatically supply strategically placed feed troughs with grain for the eight cows being milked.

We are in the process of converting this room into a workshop, so that I will have no excuse to not get my equipment maintenance and repairs done in a timely manner.

Interior of shop side of barn

Excuse all the things laying around on the floor, but I just completed the painting of the inside of the new “shop” this morning.  In the picture above, you can see where the 4′ deep milking pit used to be located.  We have filled in the pit with tons of gravel, and topped it off with a 5″ reinforced concrete slab.  Now that the shop has been painted, I will install work benches and storage shelving.  After that, I will plan out and install conduit for 110v/220v electrical service to locations around the shop, where I will place my compressor, drill press, etc.

Looking out a window of the new shop

The shop is in a great location far from the house, so noise from power tools and equipment will not be a bother to residents in the house.  The horses, which I can keep an eye on through the many windows in the shop, may not like the noise, but they can always stroll over to another pasture if it is bothersome to them.

Looking out another shop window

I can also keep an eye on the equipment barn, which is located out another of the shop windows.

Looking out yet another shop window

The hen house (sorry, it’s still not repainted yet) is in view of the shop, so I can keep a watchful eye on things over there, as well.

My helpers are waiting for me outside this shop window

And all the while, my trusty “helpers” can keep a keen eye out for me, too.  They certainly wouldn’t want to miss any of my foibles, as I run amok in my new shop!

It’s Time For Another Try

With beef prices fluctuating around all time highs over the past several years, there has been an economic incentive for farmers to increase production, sometimes by pushing the grazing capacity of their pastures to the point that supplemental feed becomes a necessity.  This, along with drought conditions that persist in a number of beef producing states, and substantially increased fuel costs, has pushed the price of baled hay up dramatically in recent years.  Under these circumstances, you would think that it would be easy to find a local farmer who would jump at the chance to cut, bale, and haul away all the fescue and clover hay our hayfields have to offer, especially since I ask for nothing in return.  Alas, as of now my batting average stands at a mere .500.   Here is the breakdown (names disguised to protect the guilty!)-

2001 – Farmer A accepted offer.  He cut, baled, and removed the hay promptly.  He also gave us a side of corn-fed beef in exchange.

2002 – Farmer A passed away prior to harvest.  Farmer B cut, baled, and removed 1/2 the available hay, long after it had lost any nutrient value.  The rest went to waste.

2003 – Farmer B committed to cut and bale the hay, but never showed up.  The hay again went to waste.

2004 – Farmer C asked us for the hay.  He cut, baled and removed the hay promptly.  He also filled our barn with square bales of hay for our horses.

2005 – Farmer C asked us for the hay.  He cut, baled and removed 1/2 of the available hay, but due to equipment failure, 1/2 of the hay went to waste.

2006 – Farmer C again asked us for the hay, but when it came time to harvest, his health precluded his doing the work.  All of the hay went to waste.

You can see that in the past six seasons, we only had three complete harvests, which accounts for the .500 batting average.

2007 – Hey, that’s now!  And this is what some of the hay fields look like today-

Fescue and clover

The grass is tall and the seed is developed to the point that it is ready for harvest.  It has probably reached the peak of it’s nutrient value, and enough of the seed will be shed in the processing of the hay to allow for natural reseeding of the hayfield (for a previous look at this process, see Fescue to the Rescue).

Another field

The road that leads to our home runs along side the hay field pictured above, so there is no benefit to maintaining a trail through the grass.

Trail through the hay

In places that we want to maintain easy walking and riding trails, I will use the bush hog to create paths, like the one shown above.  This path leads from our catfish pond over to the barn and paddock areas.

For this 2007 season, however, I think that the hay situation is well taken care of.  Remember the cattle that breeched an old barbed wire fence, raided a hayfield and destroyed a game feeder, from a previous post entitled Invasion of the Corn Snatchers?  Well, it turns out that the rancher who owns those cattle was renting a pasture from my neighbor.  He and his son were out here daily, working on the fencing.  When it became apparent to him that the fences were not up to snuff, he voluntarily trailered his cattle back to their former pastures, and our problem disappeared.  He (I’ll call him Mr. Rancher) was very gentlemanly about the entire situation.

Mr. Rancher recently stopped by and inquired about the wonderful hayfields we have, and asked if we would like to make a deal with him to have the hay cut and baled.  I told him he was welcome to take all the hay he wanted, as I hated to see it go to waste.  He graciously accepted the offer, and I’m close to certain that he will actually harvest and bale our hay.  Why?  First, he’s a young man, so I doubt that health concerns will keep him from baling the hay.  Second, he happens to be the service manager for our local Ford dealership, so I suspect that he knows the value and necessity of keeping his machinery well maintained.

As an aside, it can never be a bad idea to give the service manager at your local Ford dealer free hay – especially if you happen to own two Ford vehicles!

You may wonder why I am only “close to certain” the hay will get baled?  Because, it seems that Mother Nature sometimes has a say in these matters, as well.

Threatening weather

These are the skies we have been seeing on and off this past week.  When processing hay, it is necessary to have several dry days in a row so that the grasses have a chance to dry a bit.  If the grass is baled with too high a moisture content, then the heat that is generated within the bales as a result of the natural drying processes causes bad things to happen.  Such as reduced nutritional value, formation of molds and fungi, and in some cases, spontaneous combustion.  Barns have been known to burn to the ground as a result of storing bales of improperly cured hay.

So, Mr. Rancher and I both keep our watchful eyes looking toward the heavens above, waiting for that golden sun to shine down upon us with all it’s glory.  Or else how will I ever be able to write a blog post with pictures of hay baled from these fields?  Tell me, how will I?