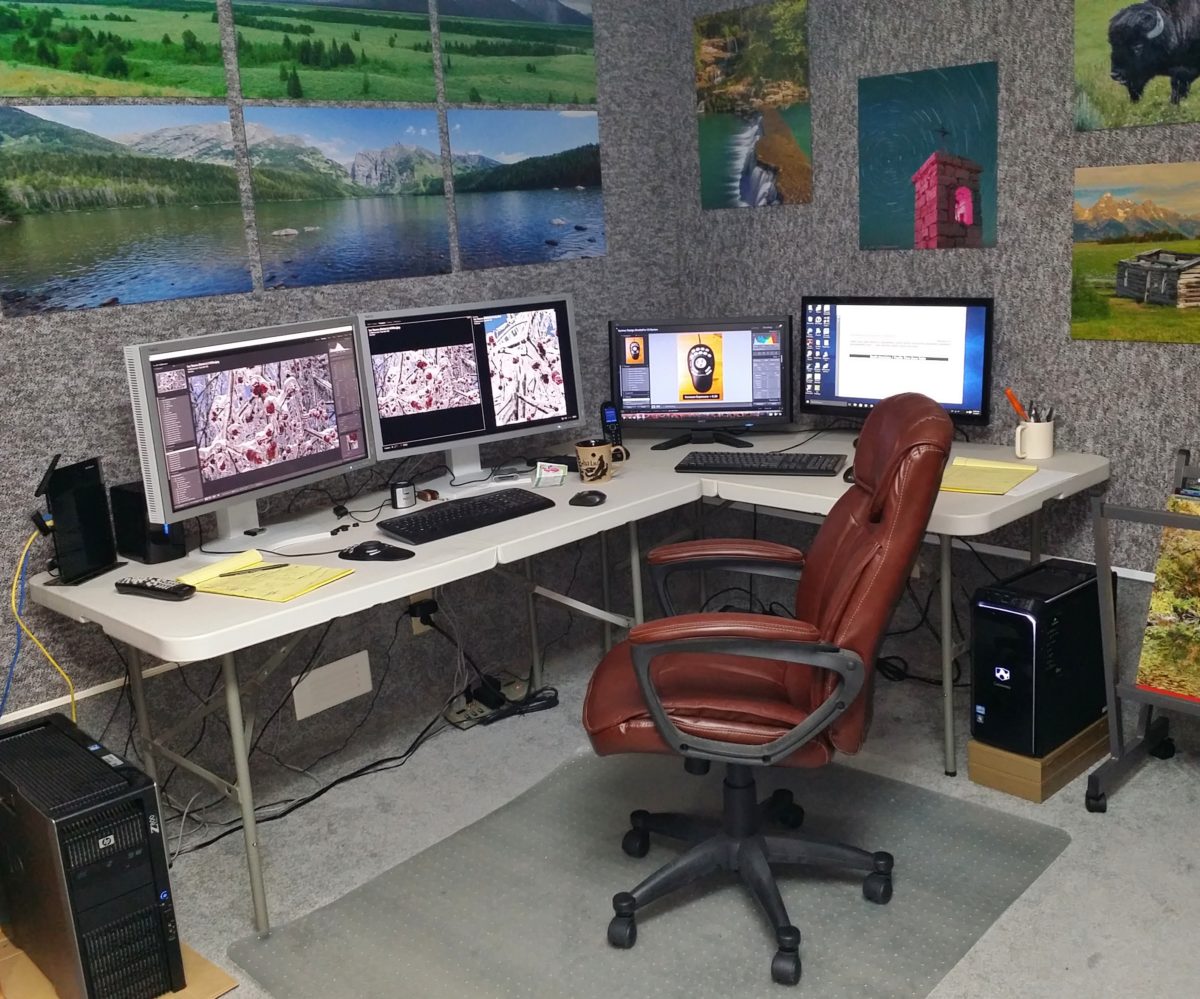
This is my image editing workstation. Unlike many photographers, I relish the hours spent in my digital darkroom, perhaps as much as I enjoy the hours spent capturing the RAW data that provides the basis for my final images. In examining my workstation, you might be tempted to ask “why four monitors?”  Because I couldn’t fit six on the tables!
Being a photographer as well as a blogger, I often encounter days where I am editing images for a blog post in Lightroom and/or Photoshop, writing the blog post in Wordpress, and researching the content of the post on the Internet, all simultaneously. With plenty of screen real estate, it’s fun and efficient to be a multi-tasker, but it can become a headache trying to manage multiple monitors without becoming a monitor “monitor”. This is where the ShuttlePRO v2 shines with Lightroom. Additionally, moving between Lightroom and Photoshop can be annoying, in that many common functions are invoked in different ways or with different keystroke combinations, depending on which program you are using at the moment, a situation that can be remedied with the proper use of the ShuttlePRO.  I will expand on these ideas later in this post.
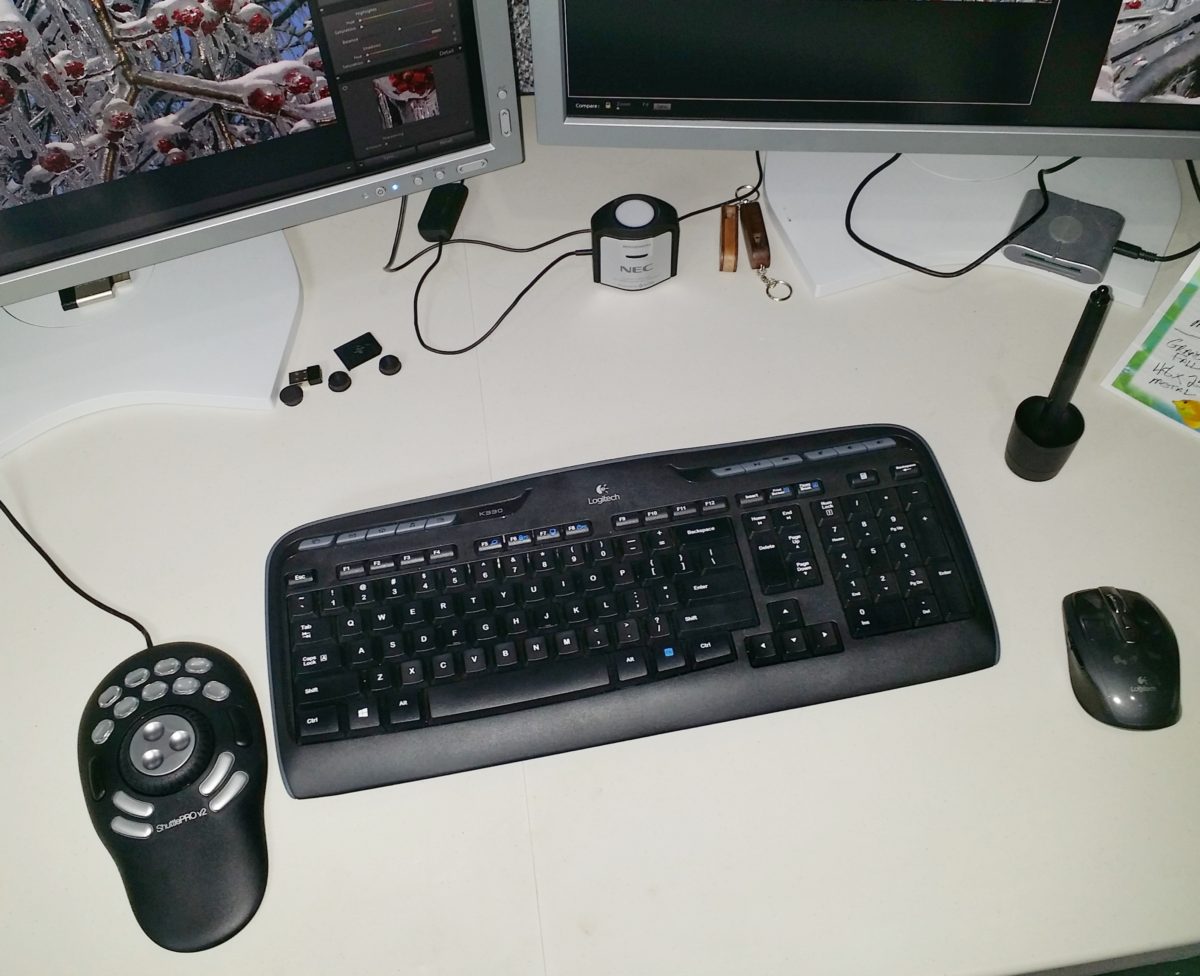
The ShuttlePRO v2 by Contour Designs is the device sitting to the left of the keyboard. It is substantially larger than the mouse on the right, but since the ShuttlePRO is stationary it utilizes less of a footprint in use than the mouse.
As an aside, on the right side of the keyboard is a stylus for a Wacom Intuos Pro graphics tablet that I find myself using less and less in my image editing work. The nature of how I work with images in post-processing has changed so much over the years, and the software I use has evolved so much, that a graphics tablet impedes my workflow now, rather than aiding it. The necessity for me to have pinpoint drawing control today is nearly non-existant, as I use layer blending modes, luminosity masking, and blend-if functions, which are not helped much with the use of a graphics tablet. The abilities of the ShuttlePRO type device are much more suited to my editing style and the way I use my software.
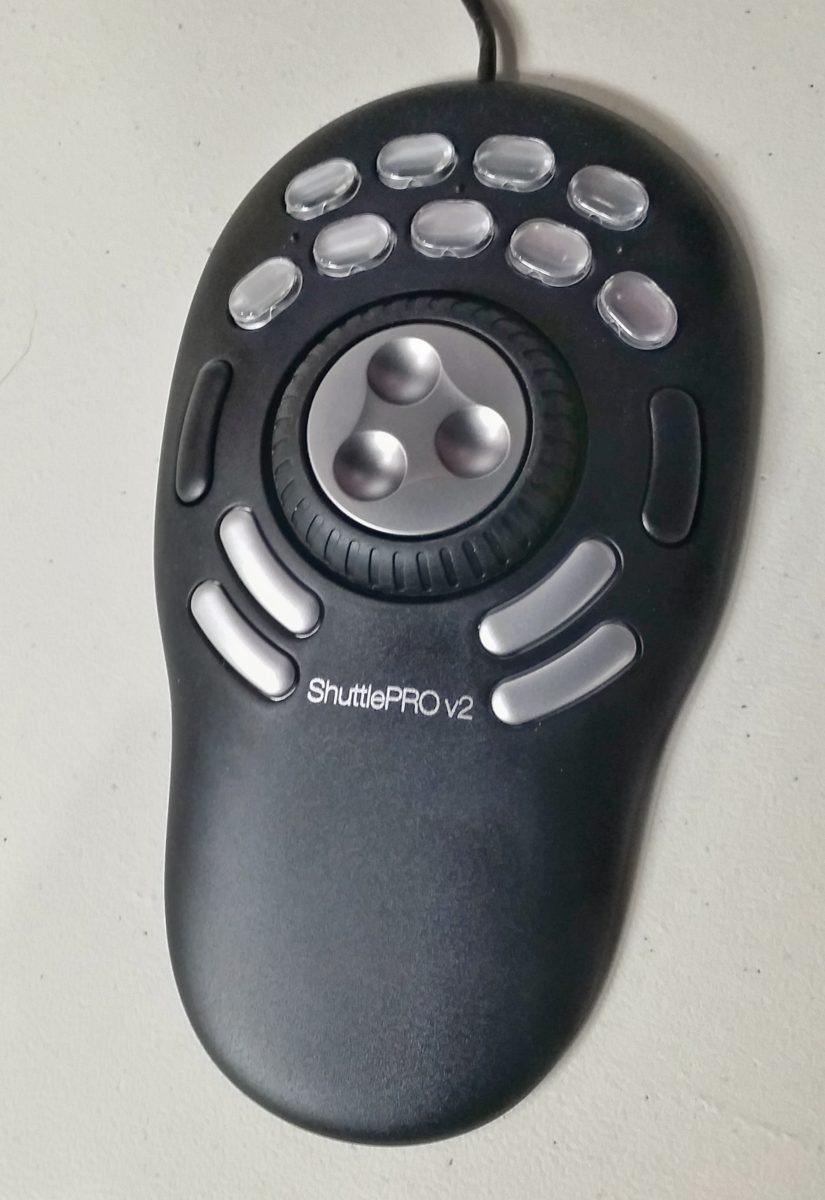
Anyhow, back to the subject at hand, the ShuttlePRO v2. Here is a close up image of the device, so you can see what it is:
There are nine buttons across the top of the ShuttlePRO that are fitted with transparent key caps that pop on and off, so you can print custom labels for these buttons if you choose. There are four silver buttons towards the bottom of the ShuttlePRO, and in the center are two black buttons and two rotary dials. The center rotary dial rotates continuously in either direction, and the outer rotary dial is a spring-loaded jog/shuttle dial. Â All of the buttons and dials are assigned keystrokes or functions of your choice, so the device can be tailored to the specific commands and keystrokes that are useful for your own particular workflow.
The software driver that accompanies the ShuttlePRO v2 is well designed, easy to use and customize, and does a great job of simply making the device work as intended, without getting in the way of the creative process involved in editing photographs. The driver keeps track of which desktop window the cursor’s focus is located, and utilizes the button assignments associated with the program running in that particular window. For instance, when I am working in Lightroom the ShuttlePRO uses the button assignments I have created for LIghtroom, but the moment I move the cursor to a Photoshop window, the ShuttlePRO immediately changes to the button assignments I have created for Photoshop.
My ShuttlePRO v2 Configuration For Adobe Lightroom CC
Now that you know what the ShuttlePRO v2 is and what it looks like, I’ll show how I have tailored it to work within my Lightroom setup. One thing many users of Lightroom do not know is that Lightroom presents the photographer with two different user experiences, depending on whether it is being used on a single or dual monitor system. Lightroom utilizes a second monitor about as well as any software I have encountered, with many options available for either monitor at any given time. But getting the two monitors to display the information you want, in the format you desire can take many clicks of the mouse, in several locations on each screen, to achieve the desired results. Switching this around on the fly becomes cumbersome, so my first assignment for the ShutterPRO was to try and streamline and ease the use of the two display monitors.
I have assigned the top two rows of buttons on the ShuttlePRO to control the display modes of the two monitors, with the top row of buttons controlling the left monitor, and the second row of buttons controlling the right monitor.
The top row of button assignments are for the left monitor, which is where the main Lightroom operations take place. By assigning the top row buttons to [GRID], [LOUPE], [DEVELOP], and [PRINT], I can immediately jump to any of these modes from wherever I happen to be in the program at the moment. By assigning the second row buttons to the right monitor [GRID], [LOUPE], [COMPARE], and [SURVEY] modes, I can immediately switch the second monitor to the view that is most appropriate for the work I am doing at the moment. Each monitor can be set independently of each other, so you can make maximum use of each monitor for whatever task is at hand. The magnification of the image displayed on each monitor can be changed by rotating the jog/shuttle dial at any time. Sometimes I find the Filmstrip Panel useful, but mostly it just gets in my way. I have set the far-right button on the second row to [Show/Hide] the Filmstrip Panel, so it can instantly be accessed or dismissed as desired.
When editing an image, sometimes it is helpful to work on the image zoomed in to 1:1, 2:1 or even greater, while being able to see the editing results displayed on the second monitor with the image at normal size. Other times it is useful to do just the opposite – with each monitor now controlled at any time by the push of a dedicated button on the ShuttlePRO, adjusting what you want to see on each screen is just a button push away,  As I have become accustomed to the button assignments and muscle-memory has taken hold, using the ShuttlePRO has become second nature. It is almost as if I just think about what I want each monitor to display, and it magically appears!
A very powerful feature of the ShuttlePRO is the way it handles all the adjustment sliders in Lightroom. There are various MIDI controllers on the market today that work in conjunction with Lightroom, such as the Behringer BCF2000. These MIDI controllers use either rotary dials or mechanical sliders to manipulate the slider controls within Lightroom. Some of these MIDI controllers have as many as 18 rotary dials for working in Lightroom. Controllers of that sort are unwieldy, expensive, and take up quite a bit of desktop real estate. Additionally, MIDI controllers require the use of additional controller interface software to work with your computer system.
The ShuttlePRO eliminates these problems by including the inner rotary dial on the device. Just hover the cursor over any Lightroom slider and rotate the inner dial – the slider in Lightroom will move either left or right, depending on the direction you rotate the dial on the ShutttlePRO. It couldn’t get much easier, and I find it much smoother to work in this fashion, rather than the mouse/slider combination I used to use in Lightroom, or using an expensive, unwieldy MIDI Controller device.
As I mentioned previously, I have set the spring loaded jog/shuttle wheel to control image zoom. At any time on either display, jogging the wheel to the right zooms in on the image, jogging to the left zooms out.
The two black buttons on either side of the center wheels have been assigned to [Undo] and [Redo], while two of the silver buttons on the bottom have been assigned to [Import] and [Export]. I have purposely left the very bottom two buttons unassigned. Â Because it is so easy to program the buttons on the fly, I use these bottom two buttons for special projects, where it is convenient to have dedicated buttons to perform tasks, but only on a temporary basis.
I mentioned in the opening of this post that the ShuttlePRO v2 could also address the problem of Lightroom and Photoshop having different ways of accessing the same functions. An example of this is changing brush sizes. In Lightroom I can instantly change the brush size by simply moving the scroll wheel on my mouse up or down. In Photoshop, however, the developers have decided that the scroll wheel should always increase/decrease image size, not brush size. Instead, one must use the bracket keys on the keyboard, or the drop-down brush palate along the top menu strip. This just drives me up the wall – why must Adobe use different methods to achieve the same result in these two programs? But with the use of the ShuttlePRO, problem solved! I simply programmed the Inner Dial of the ShuttlePRO to control the brush size, and now it is as simple to adjust my brush in Photoshop as it is in Lightroom.
Conclusion
I have been amazed at just how useful the ShuttlePRO v2 has become in my editing routines. I have fully incorporated it into my Lightroom workflow, and am just beginning to explore the best ways to utilize it’s capabilities for my Photoshop usage. After that, I will see how it might integrate with other software I use on a regular basis. When I have settled on my ShuttlePRO v2 button settings for Photoshop, I will share them here.
Many times products promise the moon, but fall far short in actual performance. I feel the ShuttlePRO v2 actually delivers. It has been quite a while since I have found a piece of hardware that has hooked me so quickly. Thanks, Contour Design!
Note: The author has no relationship with, nor receives any compensation from Contour Design.


