I have been experimenting with various ways that I might benefit from the ISO invariant nature of the Sony A7Rii camera. For those unfamiliar with the concept, ISO invariance is discussed in the DPReview article Sony A7Rii: Real World ISO Invariance Study published in August of 2015, where they did some daytime testing of ISO invariance (the comments are arcane and technical, but contain valuable information).
Important Update
Since writing this post, two important and informative articles have been published that are must reads for anyone interested in the topic of ISO invariance.
The first article, by Ian Norman of Lonely Speck, is entitled How to Find the Best ISO for Astrophotography: Dynamic Range and Noise
The second article is by Spencer Cox, and is entitled ISO Invariance Explained
Both articles, while highly technical (especially the second), do a thorough job of explaining the nuances of ISO invariance, and are well worth the time required to digest their contents.
The concept of ISO invariance arises from two different camera architectures in common use to record RAW files today. The image sensor is an analog device. Its pixel output is measured in voltage levels. Â In a traditional architecture, the electrical signal will pass through electronics that control the gain, or amplification of the signal depending on the ISO set in camera. This gain, both the signal and the noise, will be applied uniformly across all pixels, which then get sent to an ADC (analog to digital converter) and from there are baked into the RAW file.
The ISO invariant camera architecture differs in one respect. The analog pixel signals travel directly from the sensor to the ADC, and any “gain” applied via the ISO setting is actually accomplished in the camera software. At that point it is then baked into the RAW file.
The theory is that since the ISO setting is applied in software, why not postpone the software boost until post-processing, rather than in camera. That way one can selectively boost exposure only in those areas that need the boost, and leave the rest of the image alone.
Luminous Landscape wrote a brief post regarding ISO invariance, and the post ISO INVARIANCE: WHAT IT IS, AND WHICH CAMERAS ARE ISO-LESS appeared on the Improve Photography website, but neither provided any examples of ISO invariance in real-world use. The biggest critique I could find of using ISO invariance techniques appears to revolve around the idea that ISO invariance fails the test in Sony cameras because of the RAW lossy compression scheme originally implemented by Sony. Whether that is an issue or not is now moot, as Sony has updated firmware to allow uncompressed RAW files as an option. If that had been a problem in the past, it is now gone.
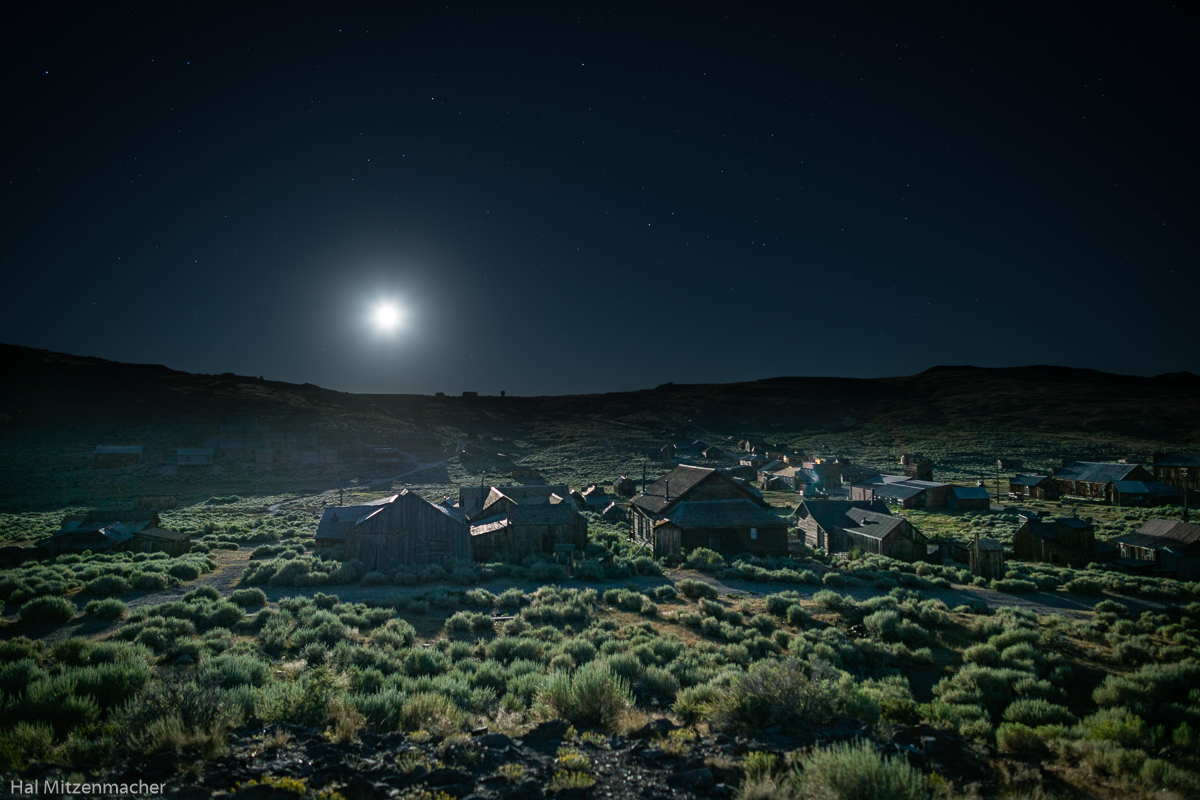
Over the past year, as opportunities presented themselves, I played around with the ideas behind ISO-less shooting in my night photography, with some successes and some failures. The photograph Moonrise Over Bodie at the top of this post is one of the successes, and shares a common trait with the other successful exposures I made with this technique – very high dynamic range, combined with sufficient ambiant light to allow the sensor to record useful information in the deep shadow areas. In other words, my moonrise and moonset shots. Beyond that, I am continuing to explore other situations where this might be a benefit, but for now, it is the tool I turn to for images such as the Moonrise Over Bodie. Here is a description of how I captured and processed this image from one single exposure and approximately 10 minutes in Lightroom.
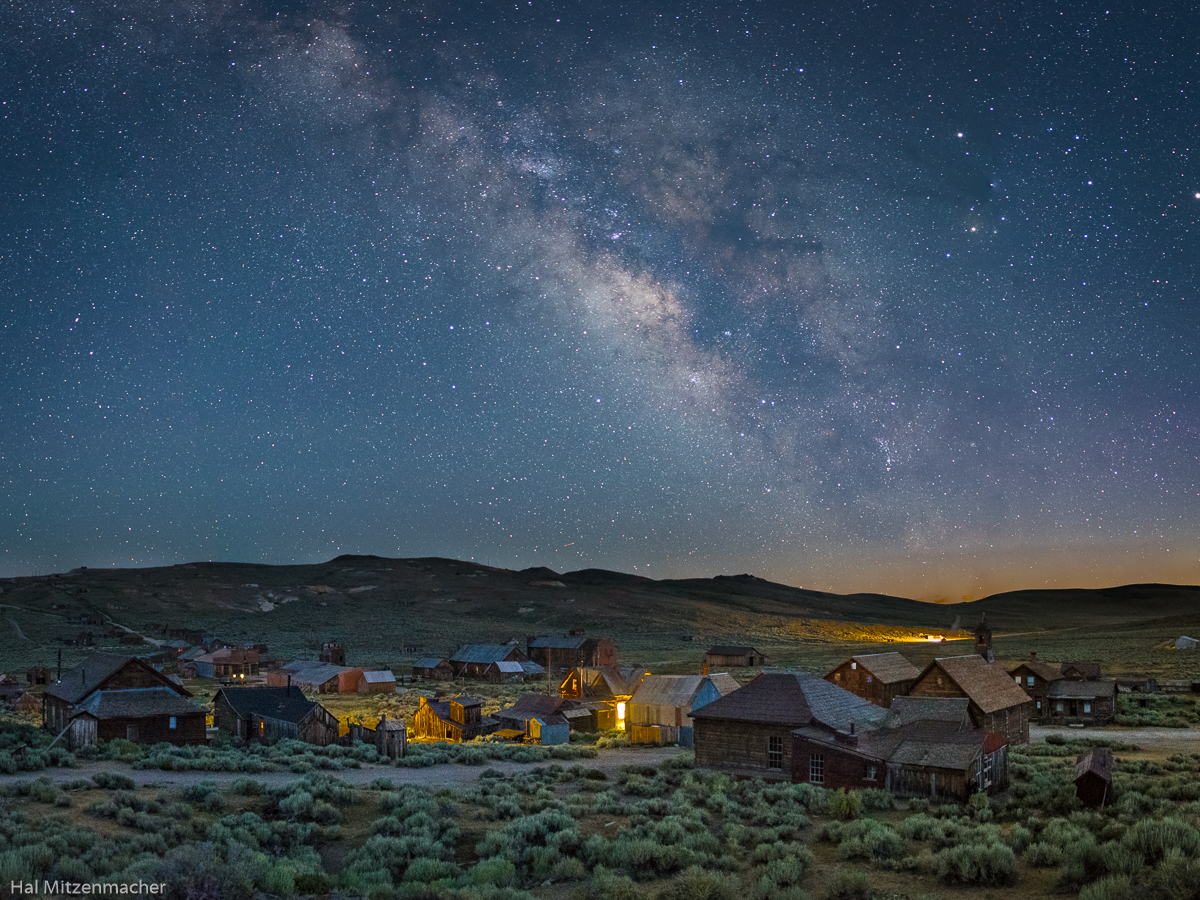
So here is “backstory” number one. In July 2016 I participated in a Full Moon Night Photography Workshop presented by Lance Keimig in Bodie, California, While the focus of the workshop was light painting and night photography under full moon conditions, we were presented with a brief period during the last night where the Milky Way would be visible immediately prior to moonrise, which is when I took the shot above. As the moon began to rise, rather than head back into the ghost town, I decided to stay atop the knoll I was perched on and do some experiments involving the moon.
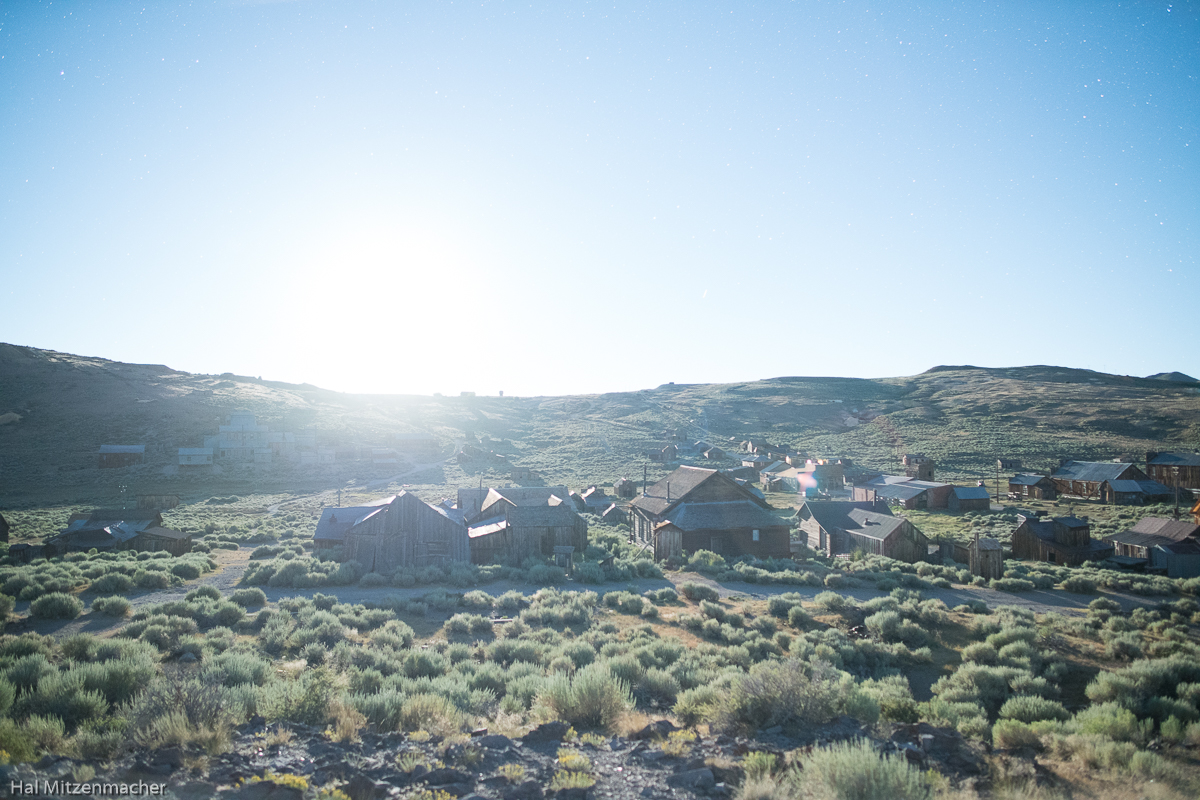
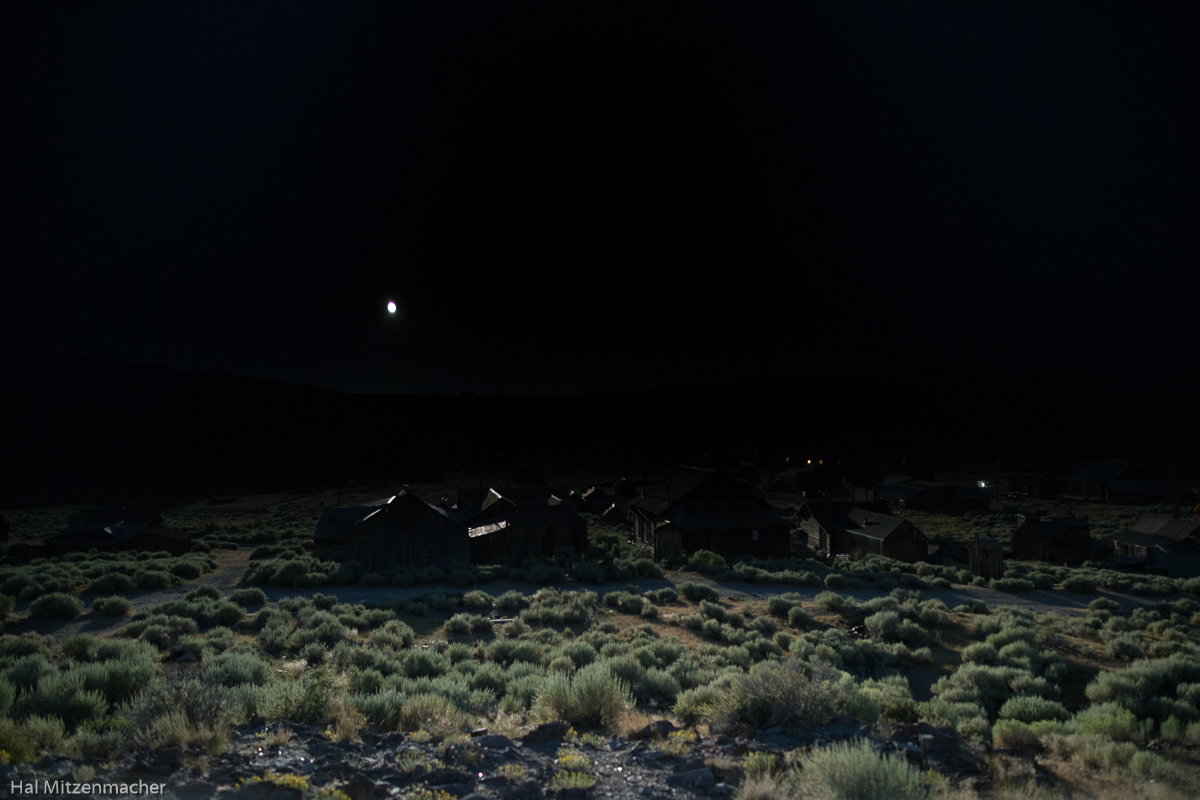
Here is my first exposure, taken at ISO 6400 for 13 seconds.The sensor was gathering sufficient data in the foreground region, but clearly the highlights were blown out in the sky with the full moon now above the horizon. While I expected the sky to be blown out, I was pleased to see that ISO 6400 allowed plenty of detail to be recorded in the foreground. But how to tame the moon?
In my usual workflow, I would take a series of bracketed exposures and either blend them manually in Photoshop or process them as an HDR image. Both methods can be difficult, time consuming, and prone to unnatural looking end results. I wanted to find out if there was a quick, easy way to capture the photograph I had envisioned in my head, and all with a single exposure.
This is where “backstory” number two comes in. While participating in a workshop conducted by Mike Berenson and Darren White in the Grand Tetons, Mike taught the group an in-camera dodge/burn method he calls the “Magic Cloth” technique. The photo above gives the general idea behind the technique – use a black cloth (or card) to cover a portion of the lens for part of the exposure, thereby simulating the use of a graduated neutral density filter.
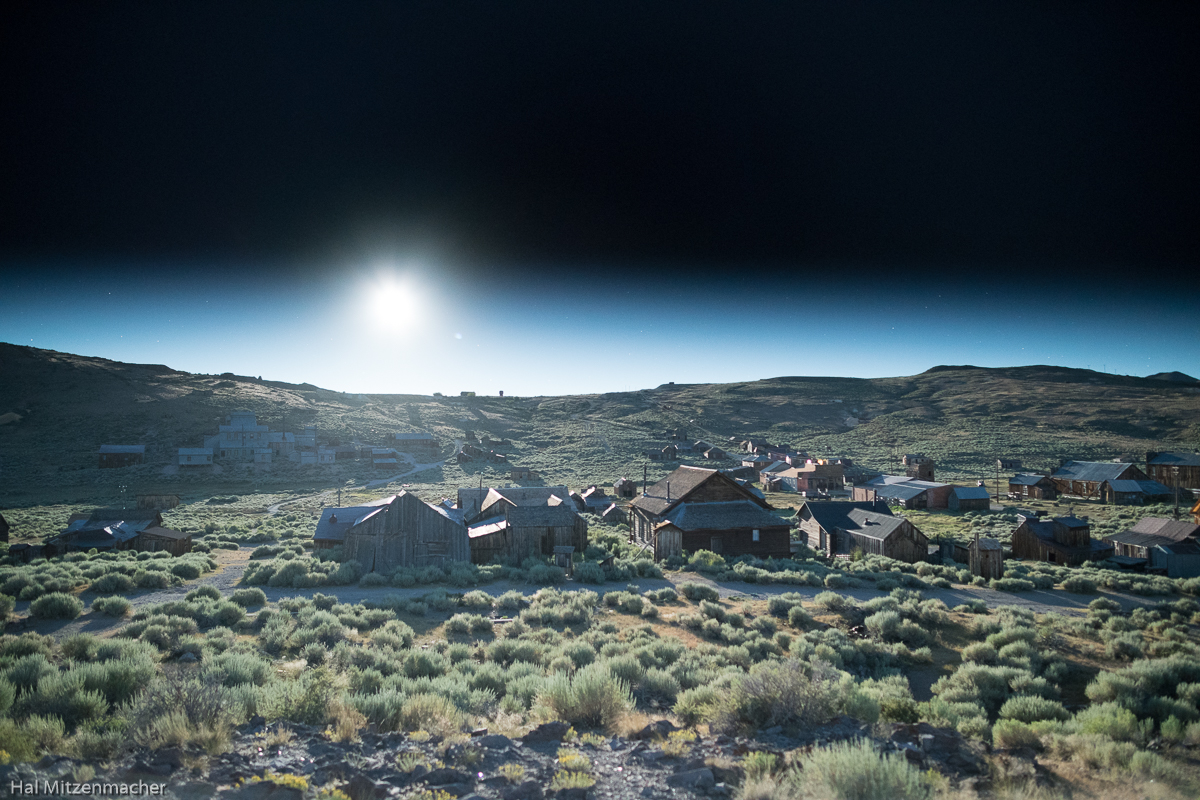
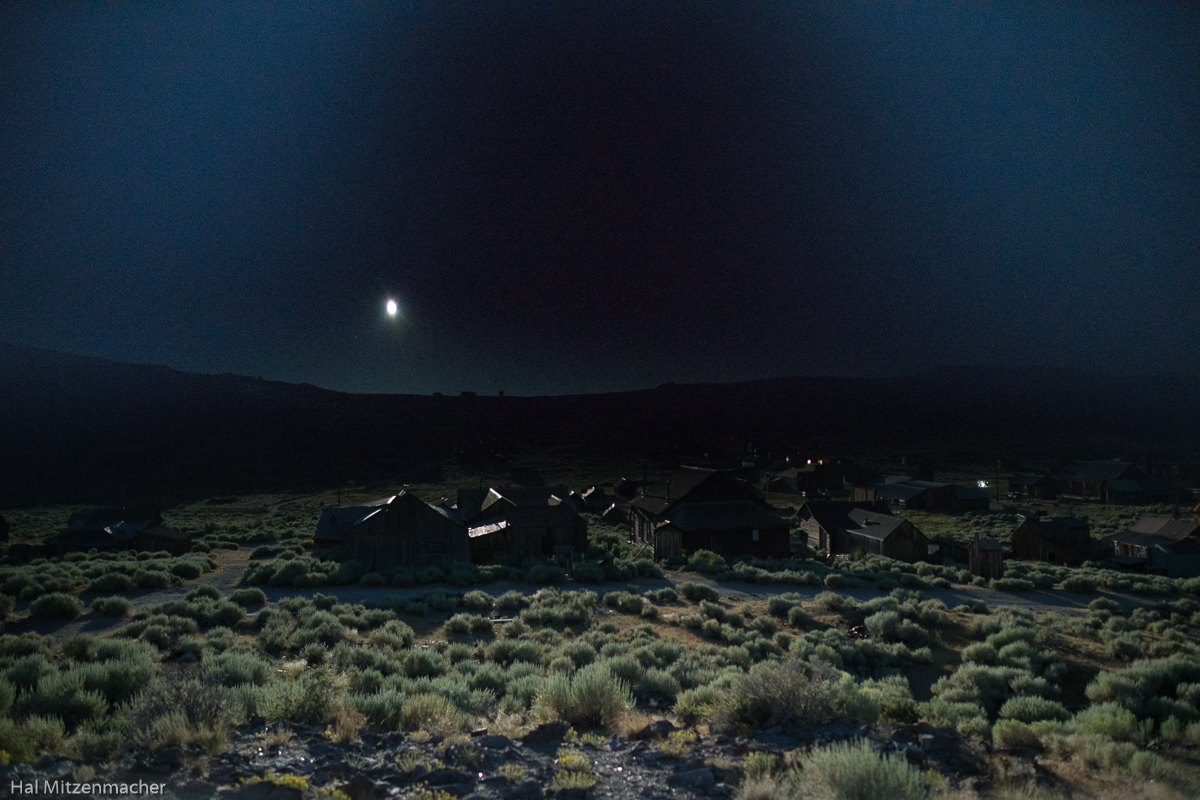
After several attempts with the magic cloth I captured this RAW file, which is the best of all my attempts, but probably nowhere as good as I could have achieved if I were to have devoted more time to the process. But time was growing short, and our group’s chaperon was there to ensure we all vacated Bodie by a designated time.
The best result I could get from the magic cloth technique is shown above. Clearly, my implementation of this technique failed. This is the result of pulling up the sky by just +3EV. Â Not what I was hoping for, so on to the next test.
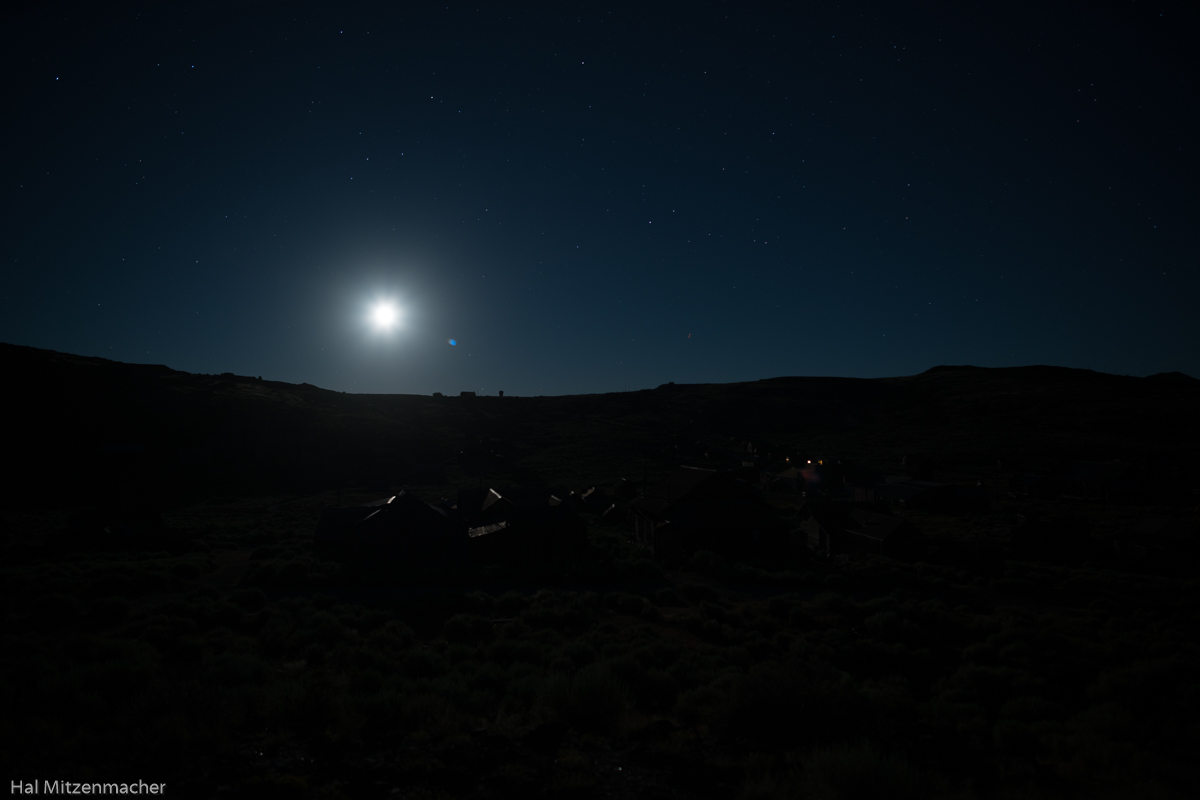
This is an exposure I took specifically for use with the ISO invariance of the Sony A7Rii in mind. It is a thirteen second exposure @ ISO 100. If the ISO invariance theories hold up, then I should be able to selectively boost the shadow areas by +6 EV and see noise results similar (and no worse) than if I had shot in-camera at ISO 6400. Well, there’s only one way to find out - by trying!
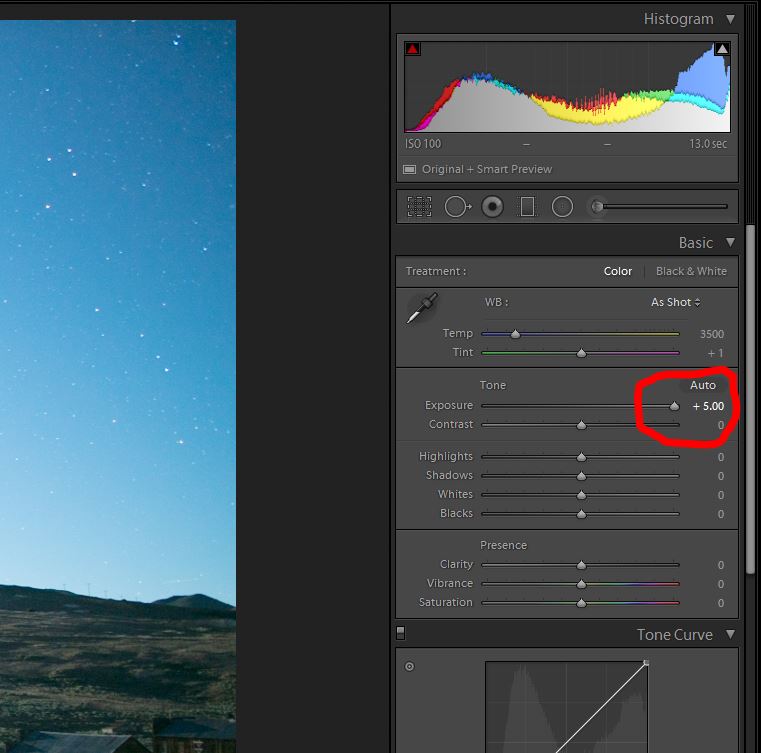
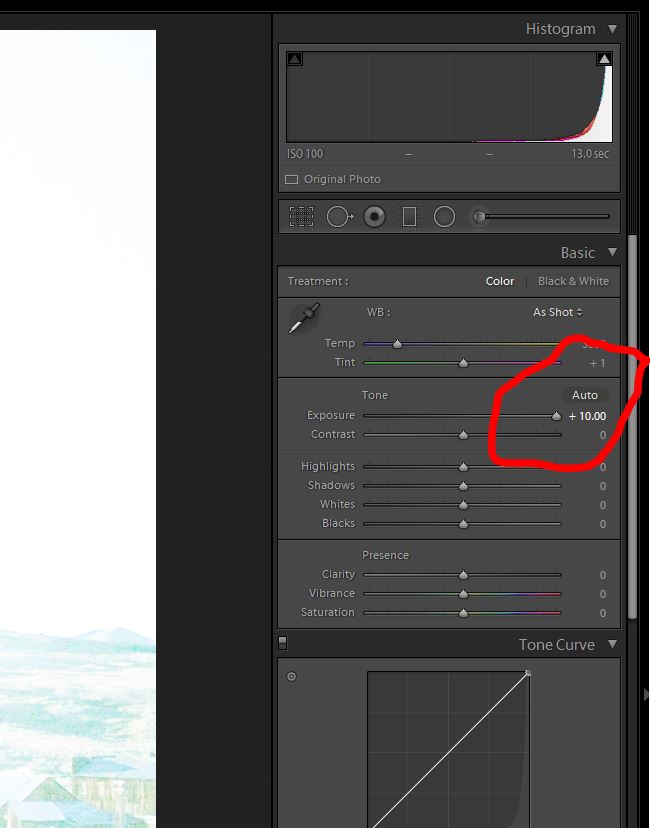
OOOPS!! Lightroom limits the exposure adjustment to +/-5 EV, but I needed to boost exposure +6 EV to make a comparison. There is a workaround, and one that actually forces us into a mode that benefits what I am trying to accomplish with this image. The trick is to create a virtual copy of the image file in Lightroom, then with the original and virtual copy selected, Merge to HDR. Leave the ghosting and toning options unchecked, and the resulting file that is returned is a file that has been converted internally from 16-bit to 32-bit floating point mode. Nothing else has changed in the file.
Notice that Lightroom now allows up to a +/-10 EV adjustment to the 32-bit image, which gives Lightroom some additional mathematical breathing room to do its bit-banging magic.
Now that Lightroom is using a 32-bit format, I can readily boost selected areas to my heart’s content, limited only by the noise that is produced by such actions. Notice that the sky has been tamed, there are pinpoint stars appearing along with the full moon, and the foreground is properly exposed. All from a quick, single exposure in the field and just a few moments in Lightroom. No composites, no blending, no bracketed exposures or HDR processing.
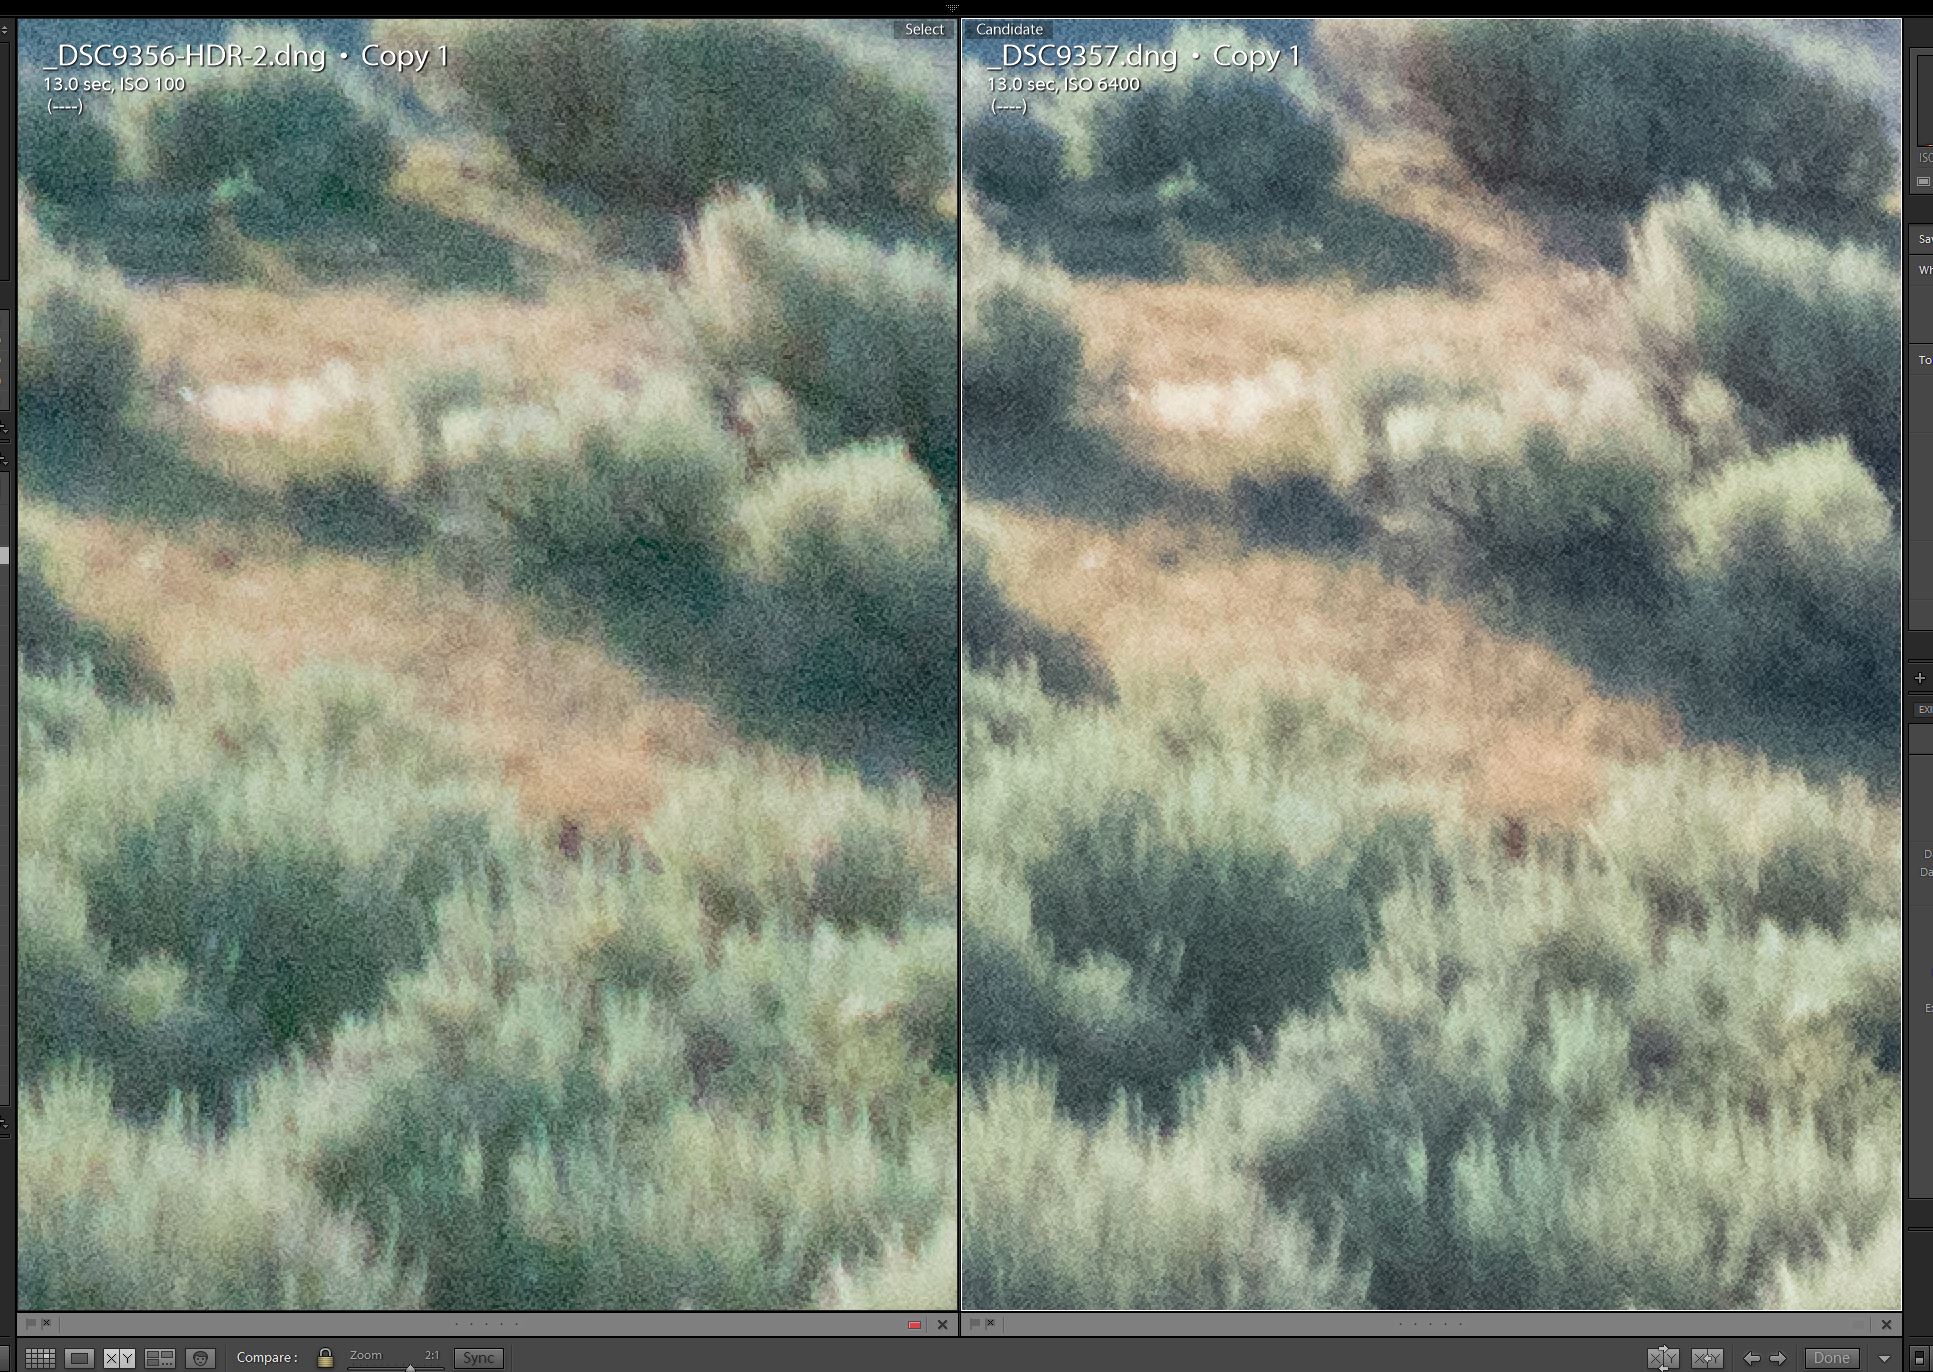
The noise that the RAW files exhibit can be compared in the screen capture above, both of which are 300% crops of the images. On the left is the image shot at ISO 100, merged to HDR to produce a 32-bit file, and boosted +6 EV in Lightroom.  On the right is a RAW file taken at ISO 6400 in camera with 0 EV boost. As far as my eye can tell, the results are identical, or so close as to be negligible. It seems that there just might be something to this ISO invariance concept, after all. I will be testing the concept for other scenarios in the future, but for now, I intend to ALWAYS take a low ISO exposure when I am out shooting high dynamic range images at night, if only because they may become the best RAW files to use for a particular shot, once back at the editing workstation.



Wow!! Never really heard the term “ISO invariant” but explains a lot in my captures with the A7RM2 and A7S. With day and night shots. My RAW images always seem to come out rather dark in post so my first step is Highlights/lights left and darks/shadows right then adjust same settings in the curve mild contrast for what looks good! I learned something awhile back with my Canon T2i and a Promote Control doing Moon shots one reason I got the A7S instead of the R, it does 5 images at +/- 3ev = 12ev. To get a focused moon ISO/SS=125 and for clarity adjust f/# start at center SS .5 sec. then 125 to 30 sec capture then HDR. I learned and did this when PS was very expensive. Now I use just the first and last images and layer enlarge the the moon to the size of the blown out area of the 30 second image. It looks natural to what the eye saw not what the lens mm captured (kinda small). Lastly the 30 sec. image has so much info to adjust that an HDR program has a problem equaling. Thanks for the education!!!
Thanks for the great tip about enlarging the properly exposed moon exposure to cover the blown area in the foreground exposure. I am going to “steal” this method, and use it for my own images!
Pingback: Milky Way Panorama Stacking with Sequator – Cuchara Valley Landscapes