In the post Creating Elliptical Star Paths in Adobe Lightroom – Part 1, I demonstrated a technique for creating elliptical star paths using Lens Profiles in Lightroom. Here is a similar way to accomplish the same outcome using the Transform Panel in Lightroom.
This technique uses perspective transformation controls within Lightroom to warp a circular shape into an ellipse. The Transform Panel in Lightroom is an equal opportunity transformer, in that it transforms, or distorts, every element contained within an image. Knowing this, we can set up a shot where the the effects of the distortion work to our advantage.
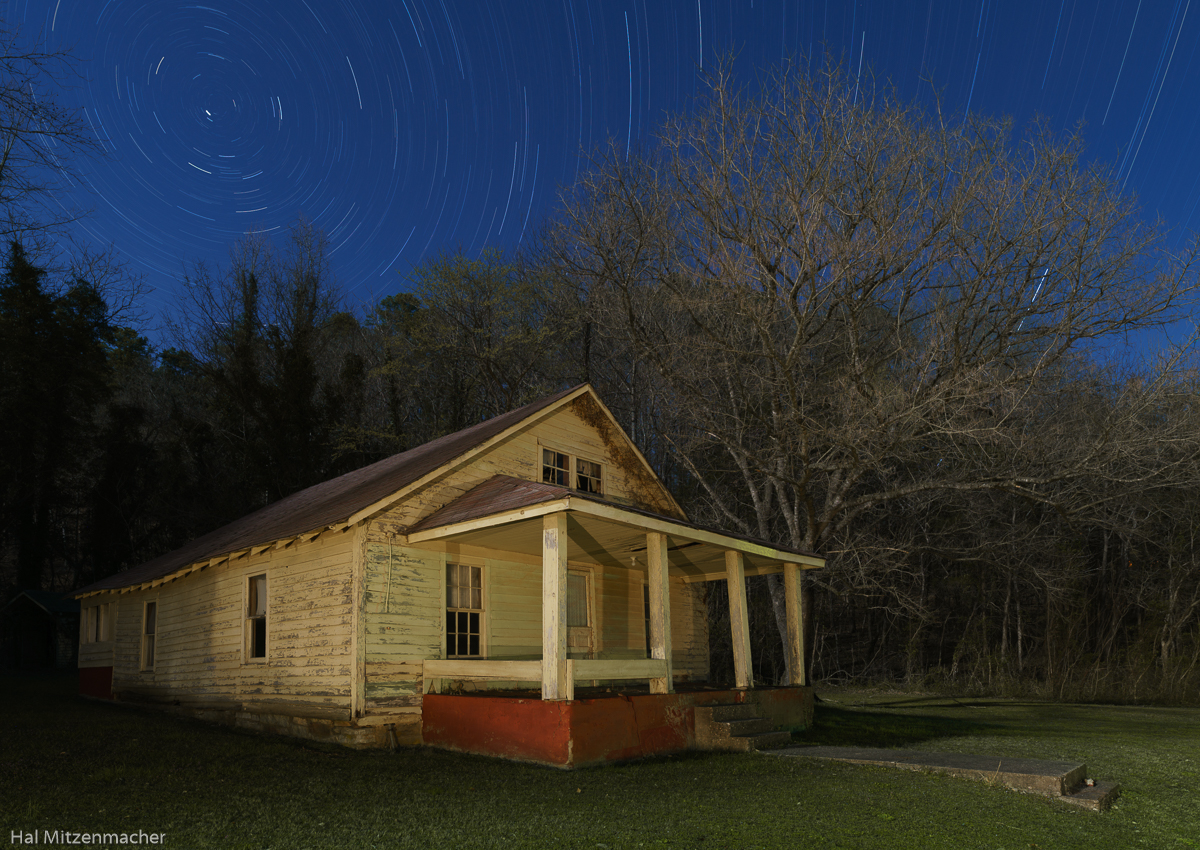
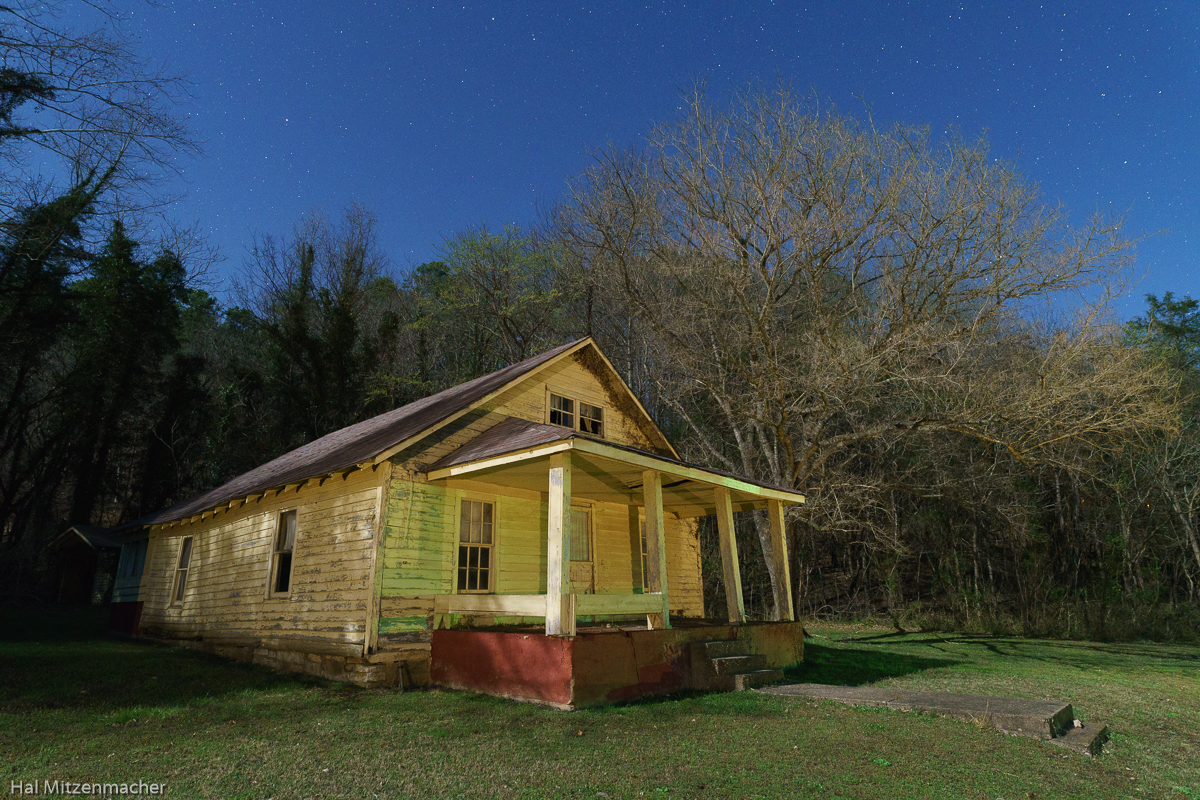
This old abandoned farmhouse in Boxley Valley, Arkansas was a perfect candidate for the use of this technique. To photograph this structure I would usually shoot with at least a 35mm lens, to put enough distance between the camera and the house to minimize the effects of distortion. I would also try to shoot with the camera nearly level and on a high tripod, again, to help minimize distortion. If I were really exacting, I might try a tilt-shift lens to deal with the distortion. But for this technique to work effectively, I actually want to create a controlled amount of distortion on the house. Let’s take a moment to see exactly what I am trying to achieve here.
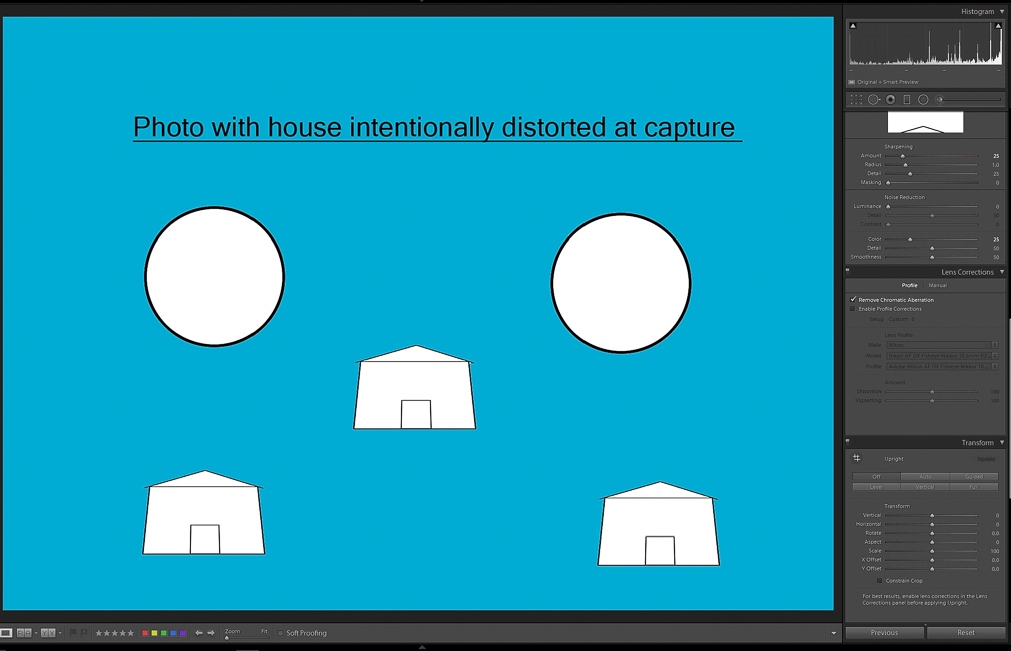
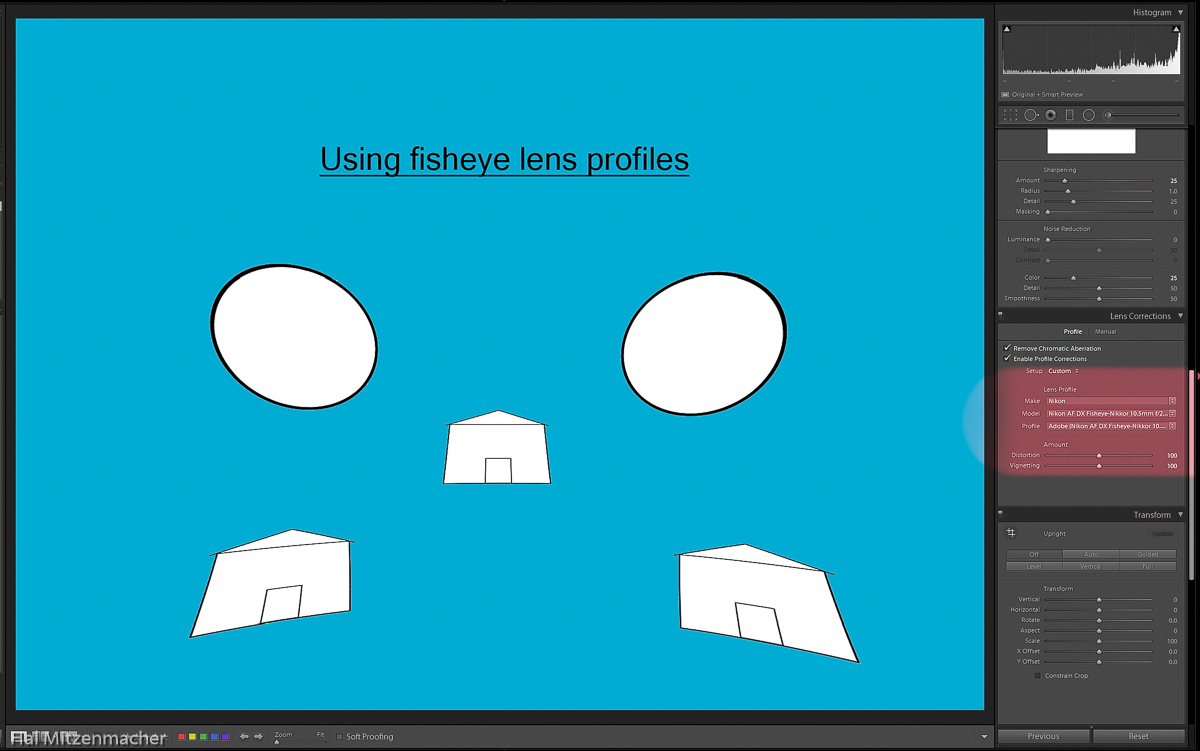
This diagram depicts a distorted figure of a house in several locations within the frame, along with circles in the upper part of the frame.
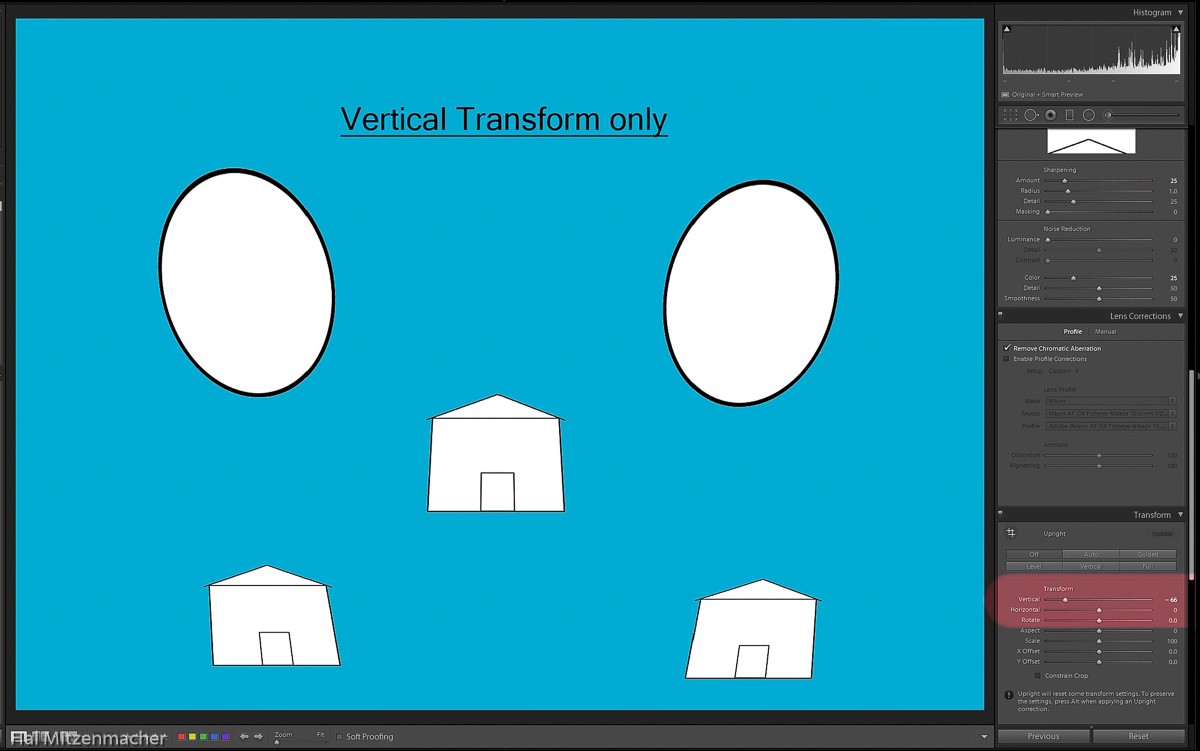
Now look at what happens when we go to the Transform Panel in Lightroom and adjust the Vertical Slider until the center house is nearly distortion free. The circles have now been transformed into ellipses. Notice, however, that the other house figures at the bottom also get distorted, along with the circles at the top.
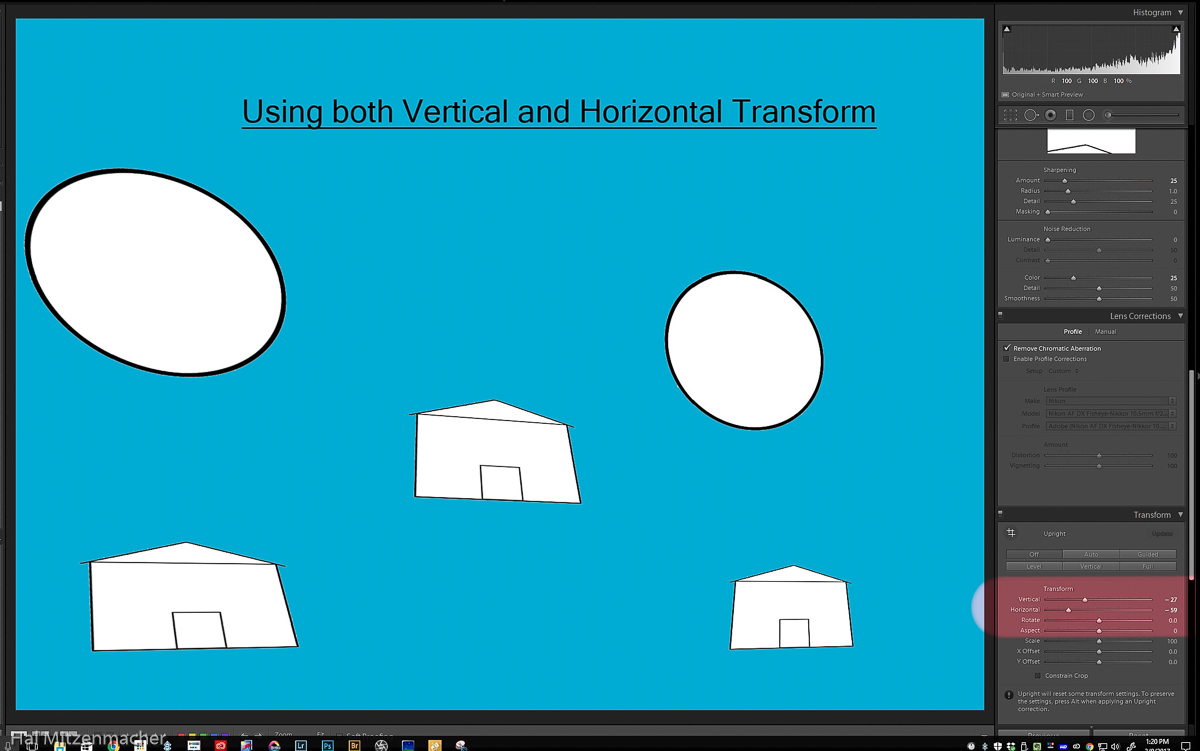
And if we were to go to the Transform Panel in Lightroom and adjust the Vertical Slider and Horizontal Sliders we will see distortion effects applied in a slightly different manner. Here, the house in the lower right appears near normal, while the other elements get warped.
Similarly, if we go into the Lens Corrections Panel and try out different fisheye lens correction profiles we see that there are altogether different distortion correction patterns applied to the image, based on which lens profile is chosen. This is the method that was presented and used in the post Creating Elliptical Star Paths in Adobe Lightroom – Part 1.
By setting up the shot initially with induced subject distortion, and then using various combinations of the sliders in the Transform Panel or Lens Profiles in the Lens Correction Panel, we can create interesting elliptical star paths from within Lightroom while ending up with a reasonably undistorted subject. Some combinations work with some images and not others, but with practice, you will soon get a feel for what subjects work within the constraints of this technique.
Here is a high ISO test shot I took to set up the composition, gauge exposure and verify focus. I chose a 20mm lens, in order to get in close to the house, and set the camera low to the ground. Both of these choices created just the right amount of distortion in the house that I was looking for, knowing that correcting this distortion in post-processing would then morph my star circles into star ellipses.
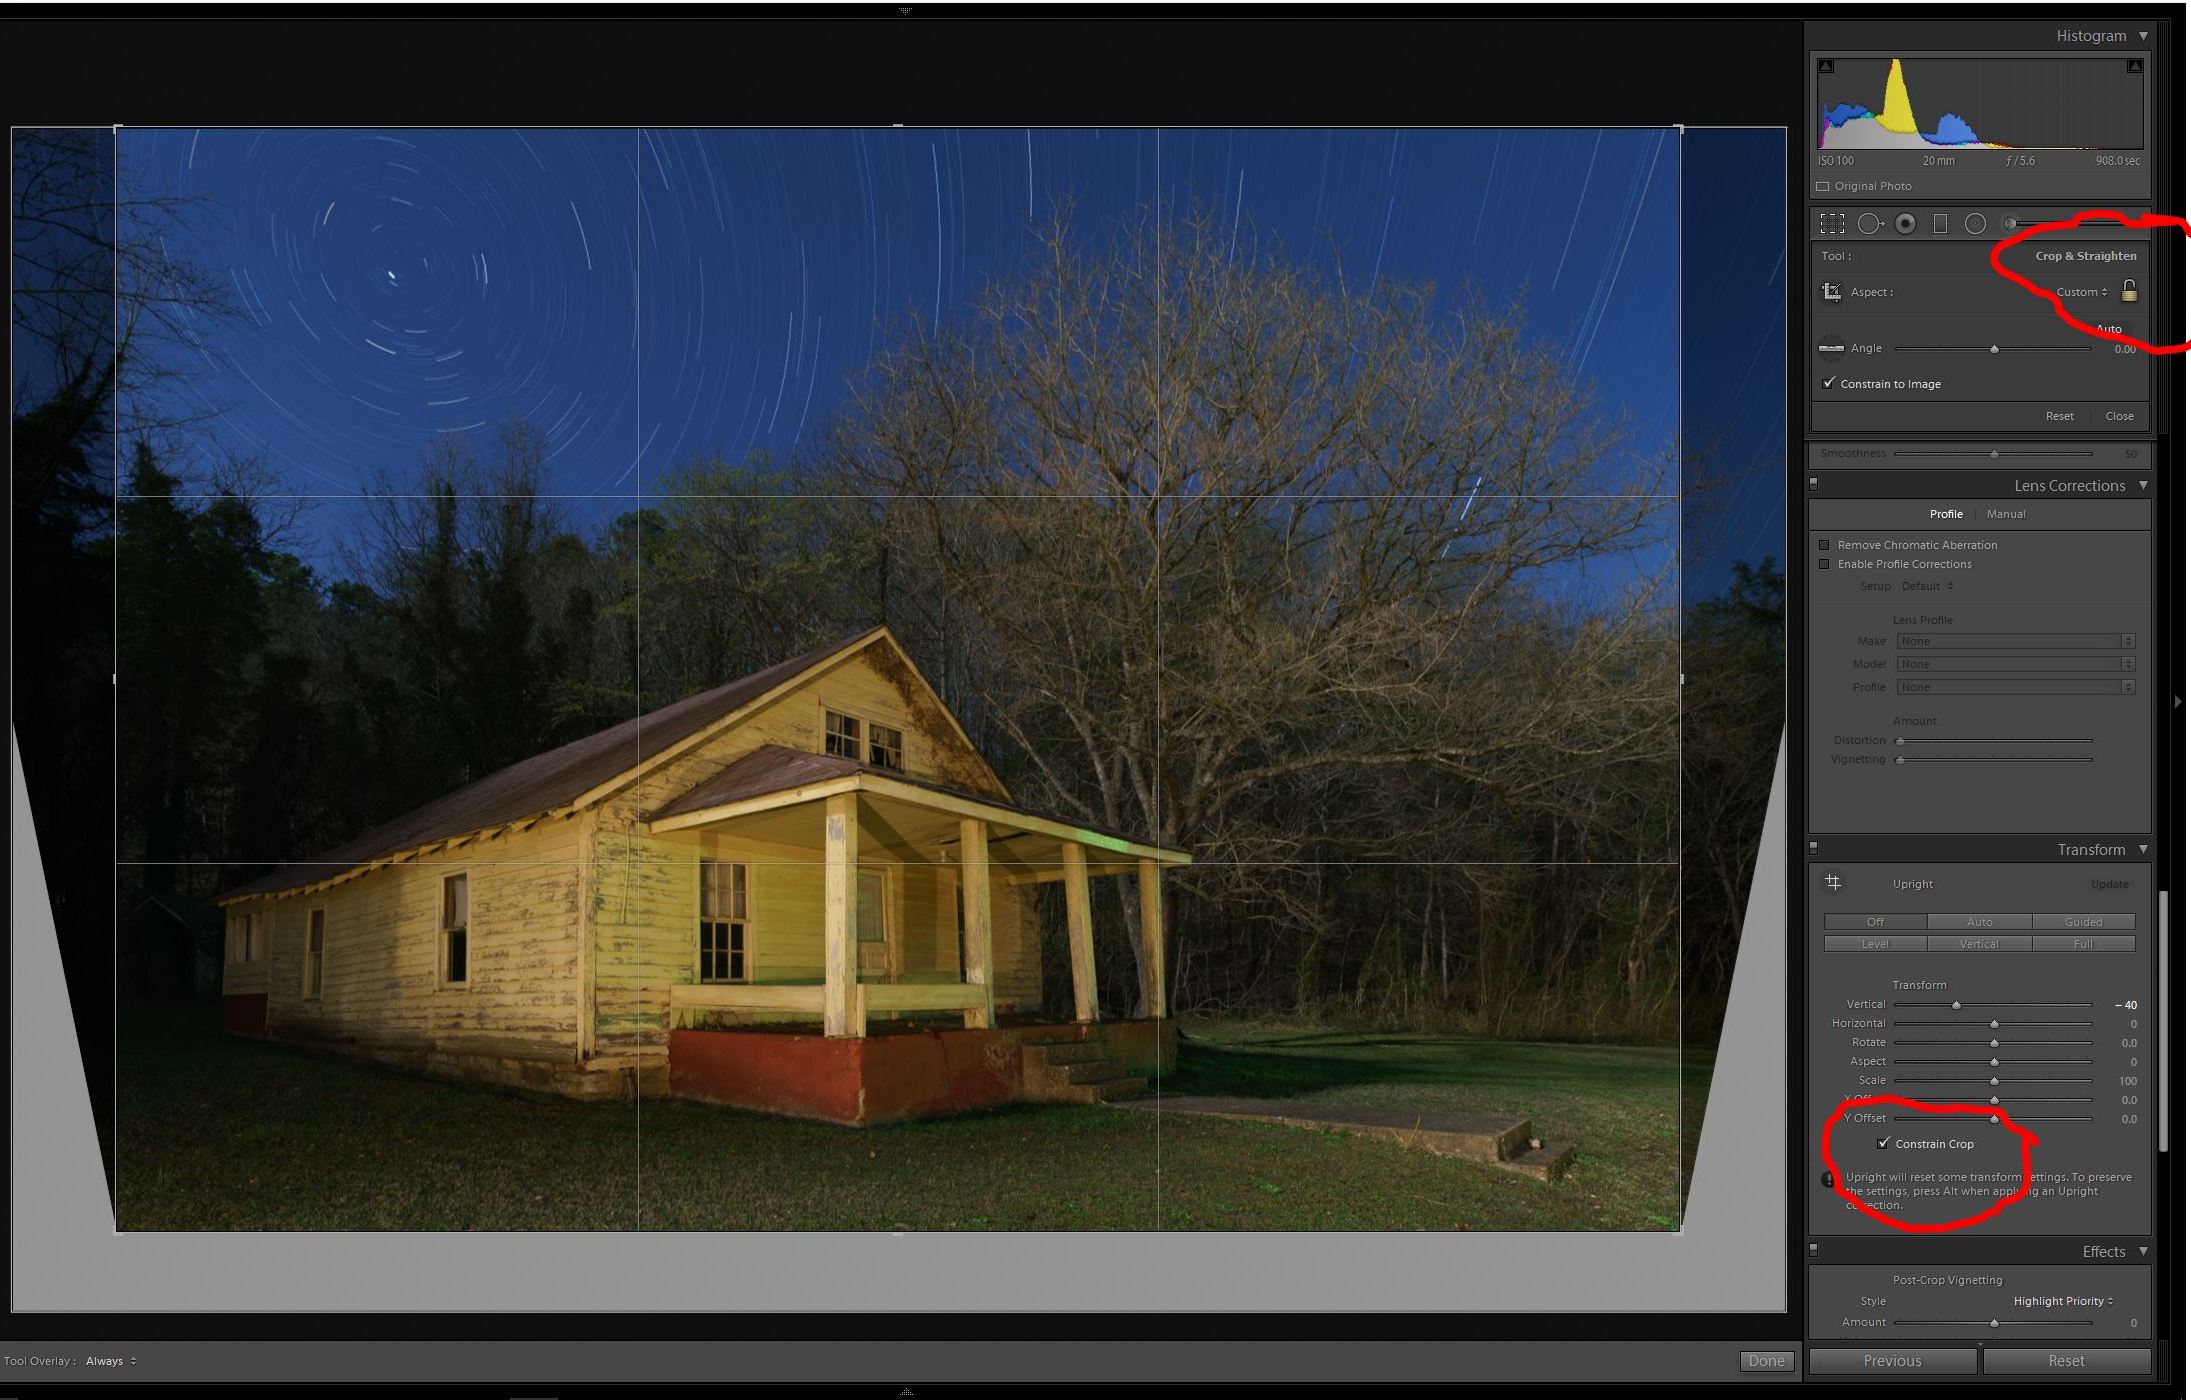
I shot five 15min@ISO100 exposures, stacked them in Photoshop to create the star circles, then returned to Lightroom (see note below). After experimenting with various settings in the Lightroom Transform Panel, I settled on -40 for the Vertical Slider, which seemed to yield the best results with this particular image. Notice that whenever using the Transform Panel, the resulting image will usually need cropping. I have found that it is good practice to overshoot the intended composition, in order to allow some breathing room for the inevitable crop. The cropping can automatically occur right within the Transform Panel if you check the Constrain Crop checkbox. If you then want to further adjust the crop to you liking, simply unlock the Padlock Icon in the Crop & Straighten dialog, as show above.
With a little additional touch up work to get rid of some color cast, the image was finished to my satisfaction. It turns out this is an interesting, simple and fun technique to add just a subtle difference to the usual star circle images one usually encounters.
Note regarding single vs. multiple exposures for creating star circles
This technique can also be applied without the necessity to stack multiple exposures in Photoshop by merely taking one exposure with a duration long enough to create the star trails of the length you desire. I prefer to use multiple exposures for a variety of reasons, but there are two reasons that I find most compelling. Both involve automobile lights, but in opposite ways.
First, there is the serious risk of an unusable exposure due to automobile headlights intruding into the scene. Suppose you are 57 minutes into a 60 minute exposure, and a car drives by and casts its headlights directly into the scene. Most likely you will have to retake the image. On the other hand, if you had decided to capture ten 6 minute exposures and stack them to create an hours worth of star trail length, you could easily mask out the spoiled portion of the relevant exposure, and all would be well. In fact, the more exposures you take, the better your odds of having a successful star circle image.
Second, you never know when incidental automobile headlights will be your friend. I often hear photographers grumble about passing motorists. Not me! Once I learned that it is not extremely difficult to mask out unwanted lights in one of a series of multiple exposures, I was free to embrace automobile headlights as a creative tool. In many instances, automobiles have accidentily provided just the right lighting touch on the subject in a way I could not have created on my own.
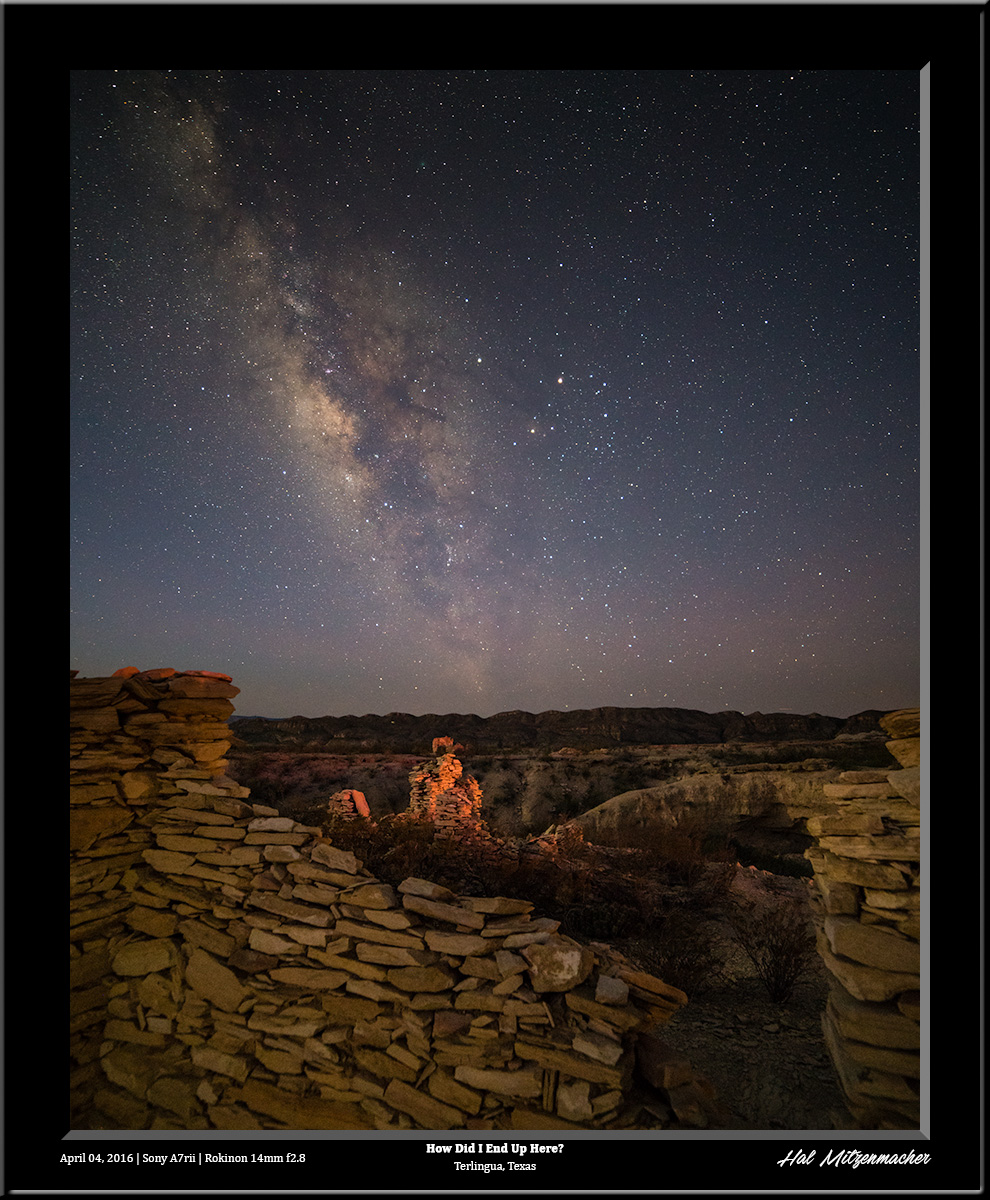
Here is an example of a “happy accident” where I was shooting multiple exposures of the Milky Way in order to stack for noise reduction purposes. A passing motorist supplied the perfect lighting for the rubble ruins in the mid-ground in a way I could not have duplicated, and all quite by accident.

